Toolchain Long-Term Support for Flight Controller Introduction 
1. Pixhawk 2.4.8 (also known as Pixhawk 1)
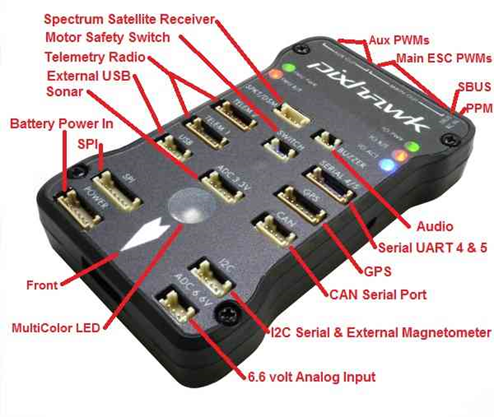
The Pixhawk 2.4.8 is an advanced flight controller designed by the PX4 open-hardware project and 3D Robotics. It features state-of-the-art processors and sensor technologies from STMicroelectronics, along with the NuttX real-time operating system (RTOS), enabling remarkable performance, flexibility, and reliability for controlling any autonomous vehicle. Its key features include:
-
An advanced 32-bit ARM Cortex-M4 high-performance processor running the NuttX RTOS.
-
14 PWM/servo outputs (8 of which support failsafe and manual control, plus 6 auxiliary outputs compatible with high-power devices), and rich peripherals (UART, I2C, SPI, CAN).
-
Redundant design with integrated backup power and a basic failsafe flight controller, enabling safe switching to backup control in case the main controller fails.
-
Integrated mixing functionality in the backup system, supporting both automatic and manual mixing modes.
-
Redundant power inputs with automatic failover, and an external safety button for easy motor arming.
-
Multi-color LEDs and a high-power, multi-tone buzzer.
-
Micro SD card slot for long-duration, high-rate flight data logging.
2. RflySim Configuration
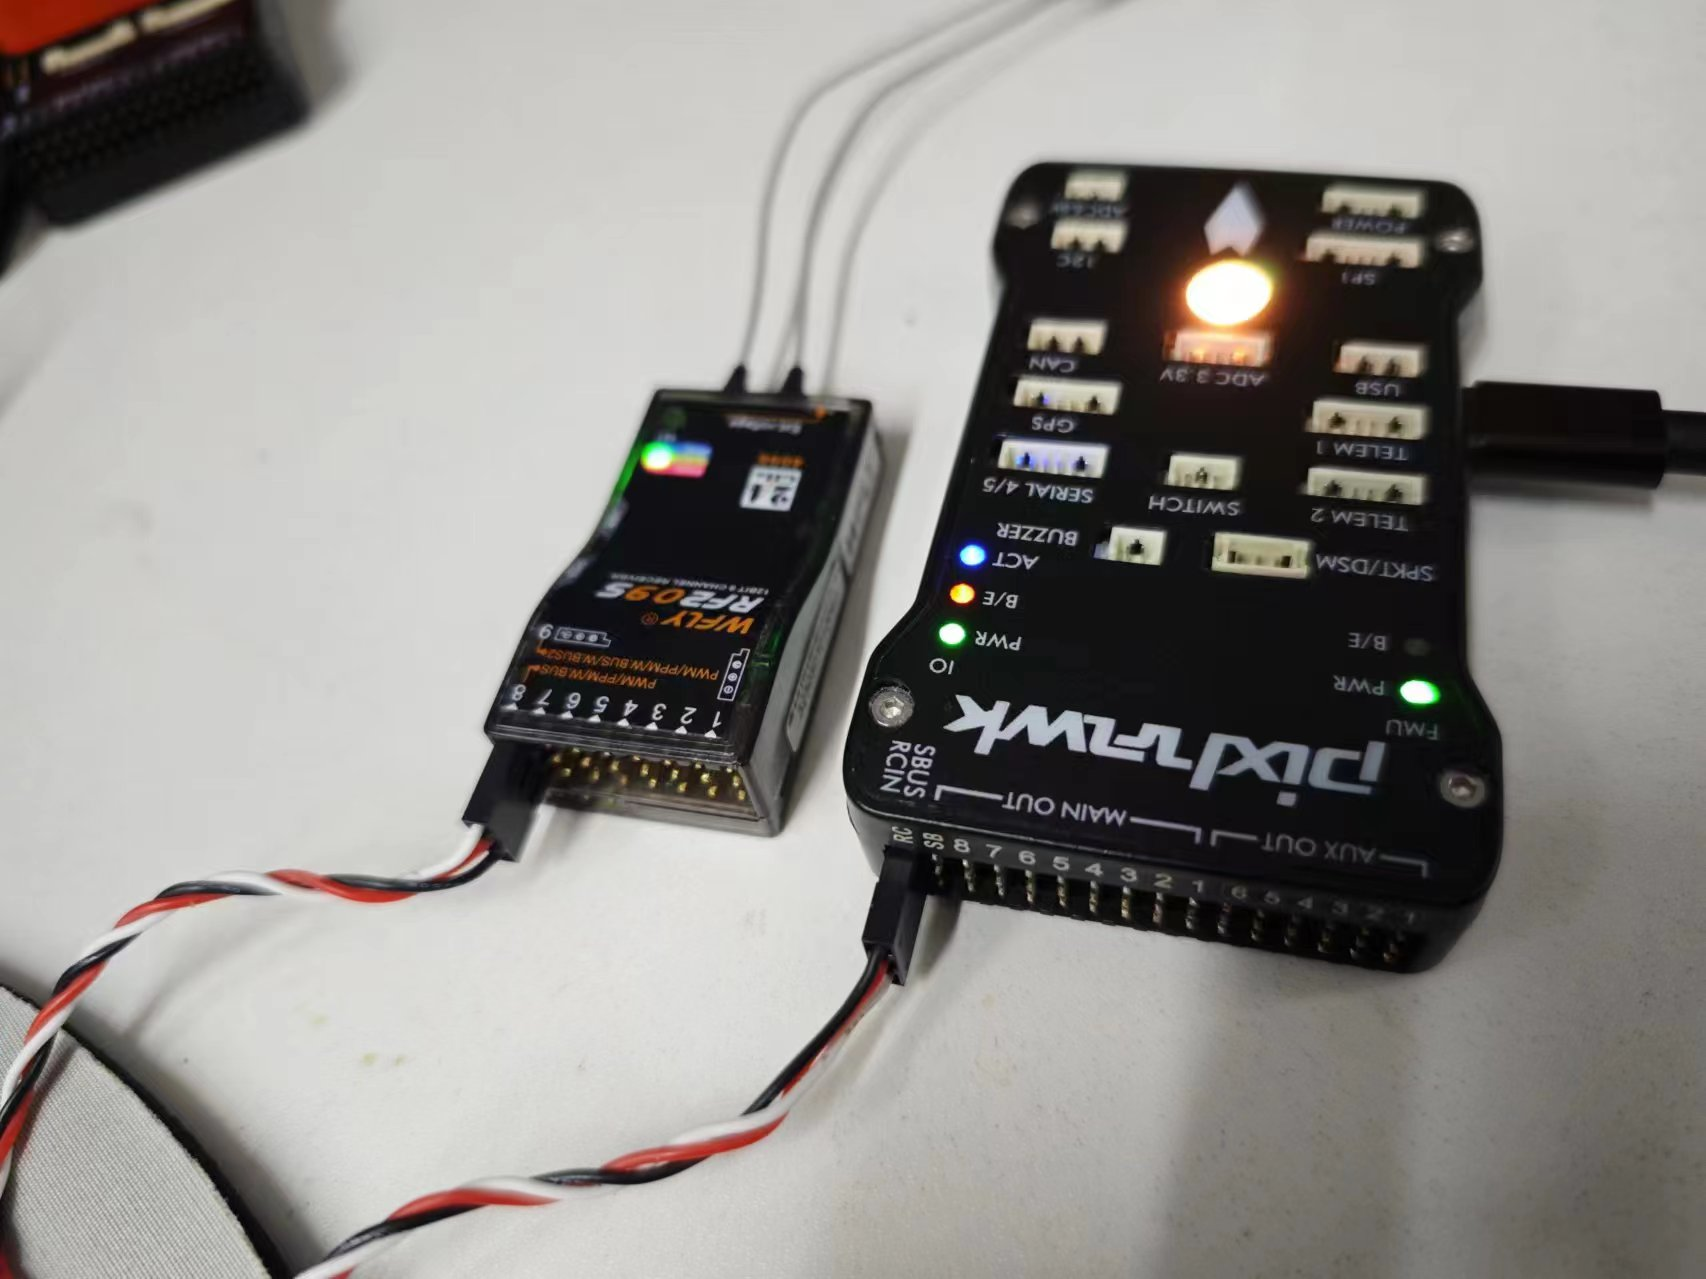
If using the Pixhawk 2.4.8 flight controller hardware (2M flash, corresponding firmware: px4_fmu-v3_default), the recommended software installation and hardware connection configurations are shown in the figures below.
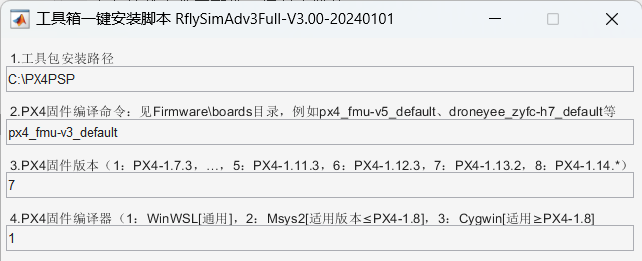
- Use the
px4_fmu-v3_defaultcompilation command. - Select option “7”: Firmware version PX4 1.13.2.
- Select option “1”: WinWSL compiler.
- The Pixhawk 1 includes built-in LEDs; no external LED module is required. Simply connect the receiver as shown in the right diagram.
Note: Starting from Pixhawk 2/3/4, built-in LED modules are no longer included, and an external LED module must be purchased separately.
3. Official Firmware and Restoration
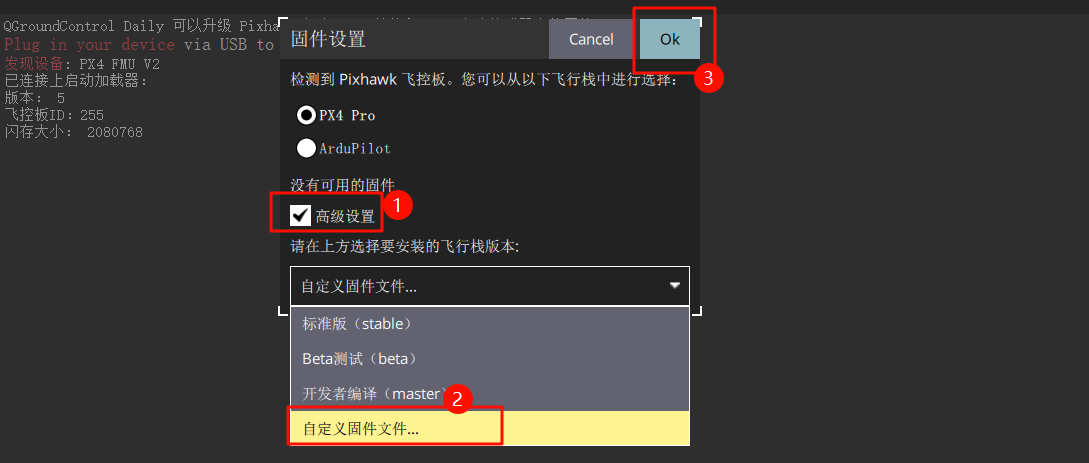
Open QGroundControl (QGC) and navigate to the following interface.
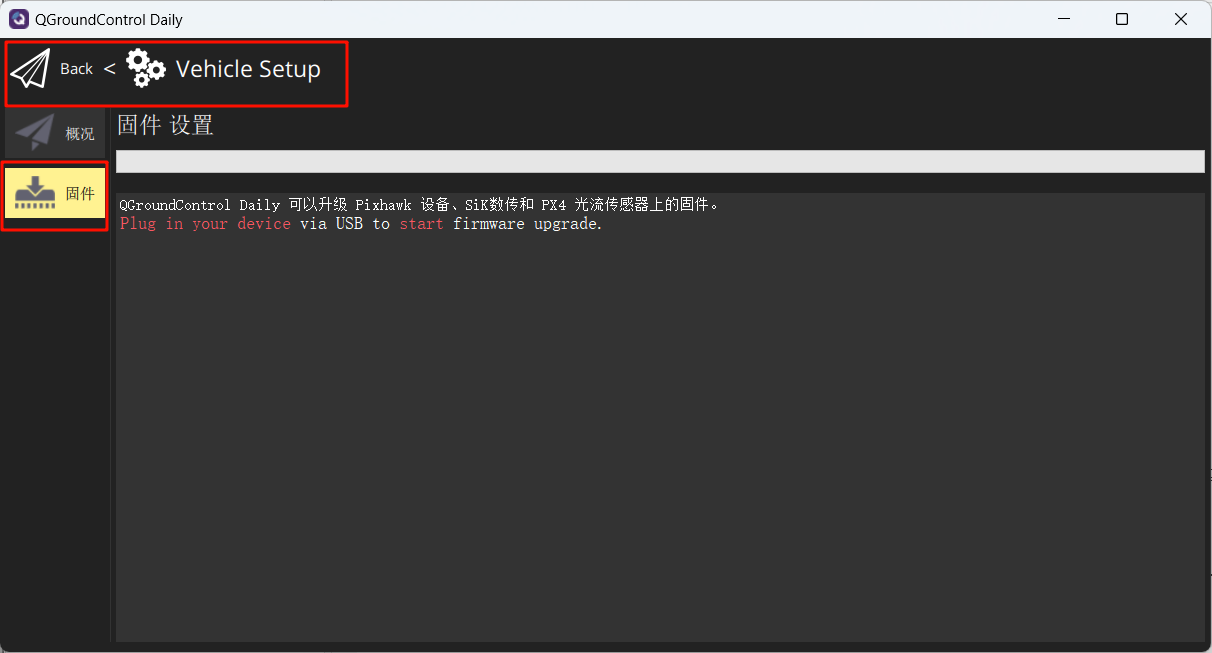
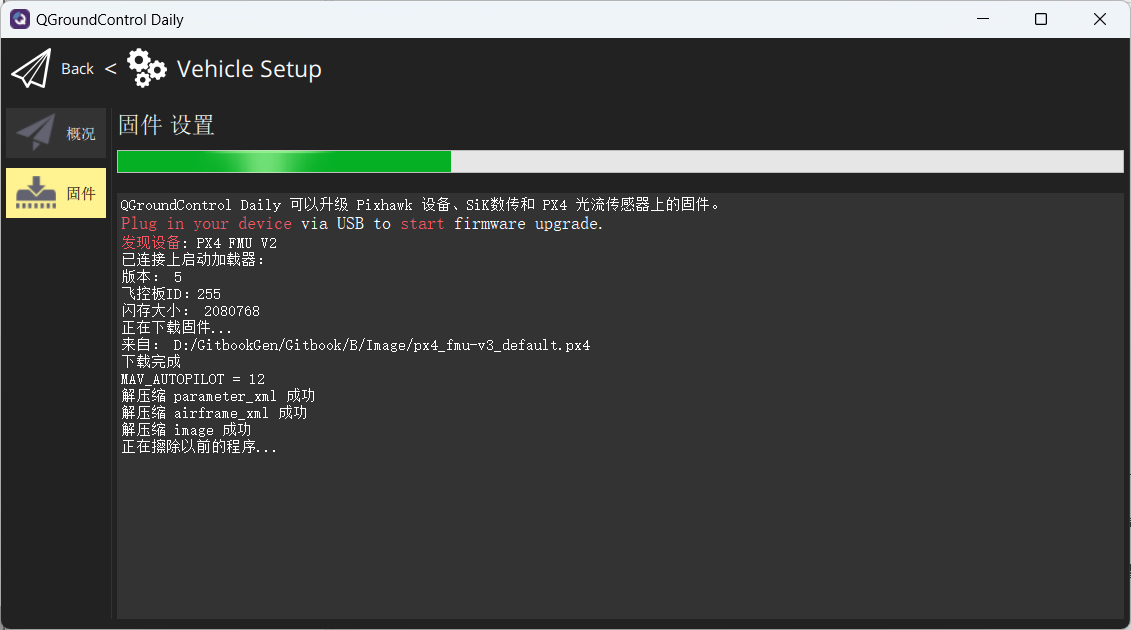
Connect the flight controller to the computer, and in the pop-up interface, select the firmware to flash: px4_fmu-v3_default.px4
Wait for the flashing process to complete.
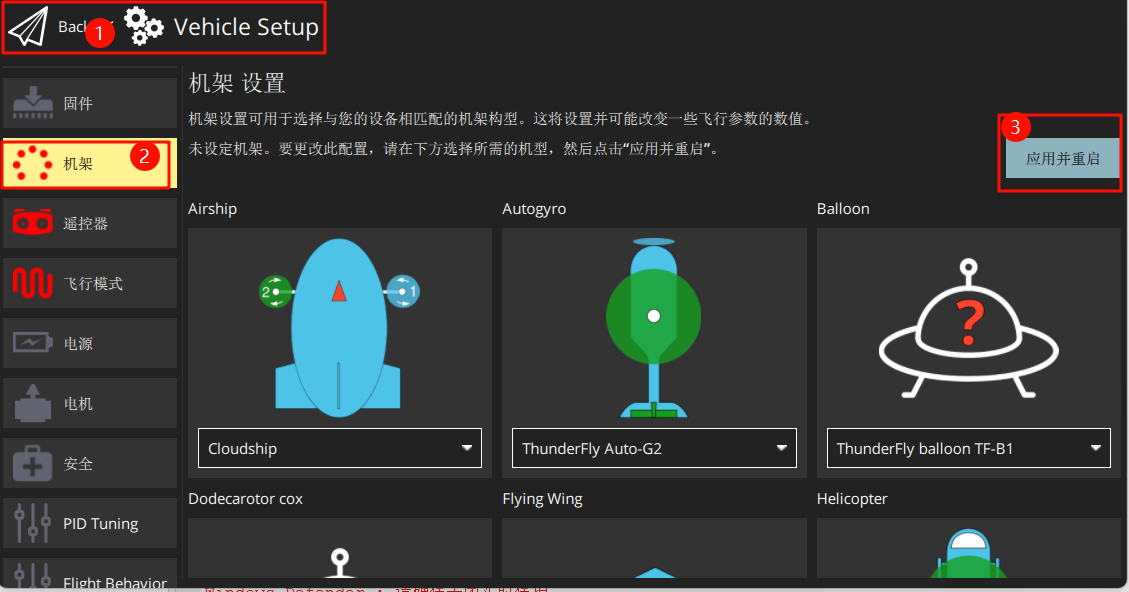
Restore the flight controller parameters to their default firmware values.

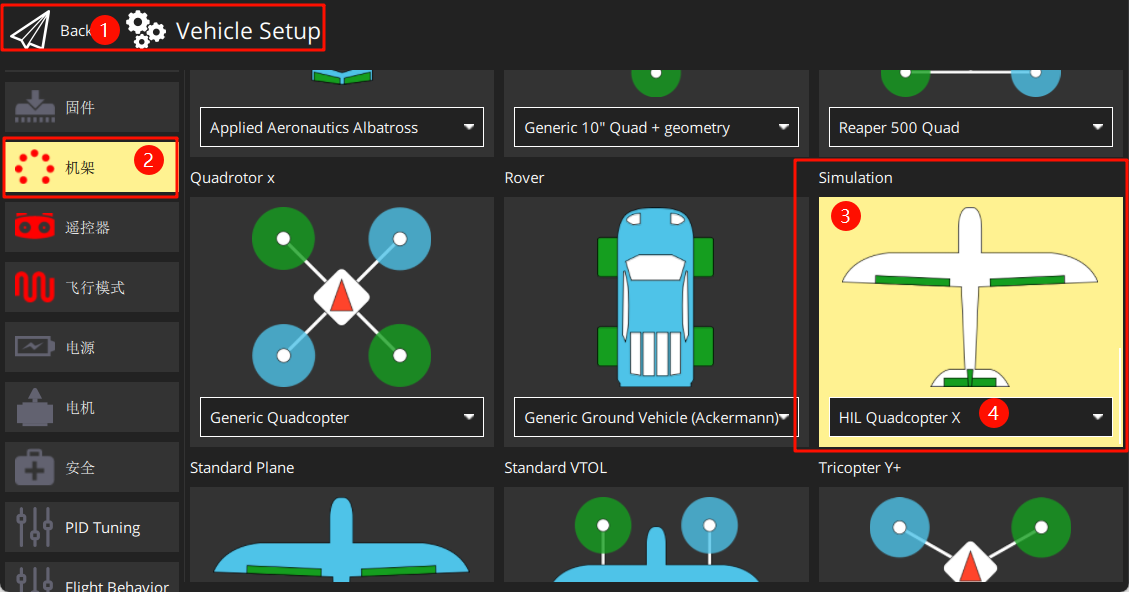
Set the airframe to “HIL Quadcopter X”, scroll to the top, and click “Apply and Restart”. Wait for the restart to complete.
Connect the receiver (pay attention to pin order) and power on the transmitter.
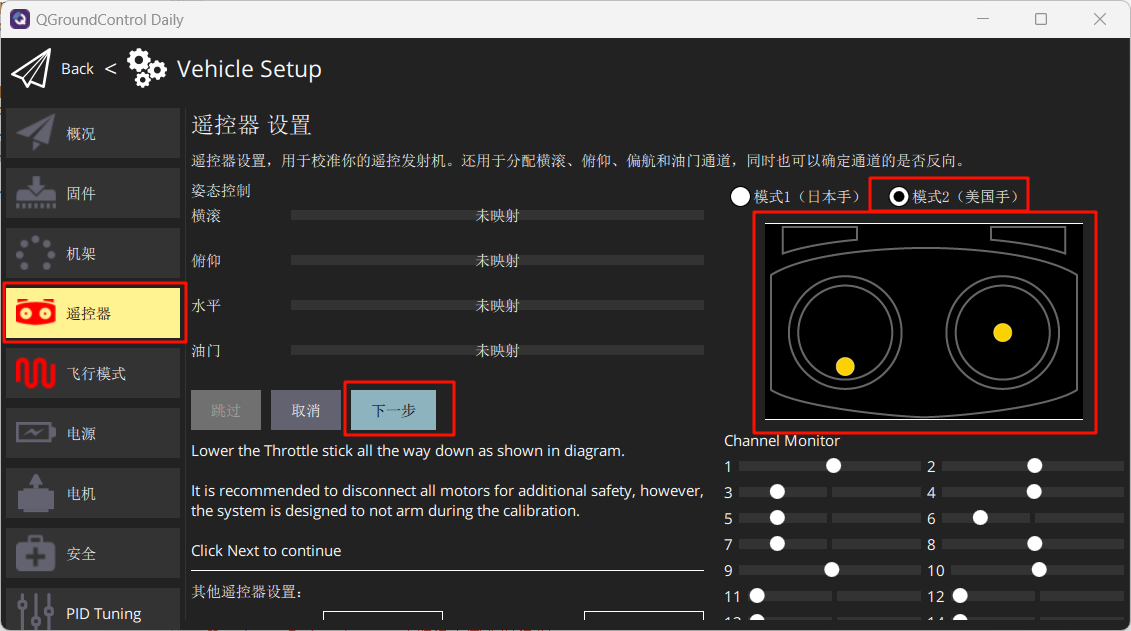
Calibrate the transmitter according to the instructions shown.
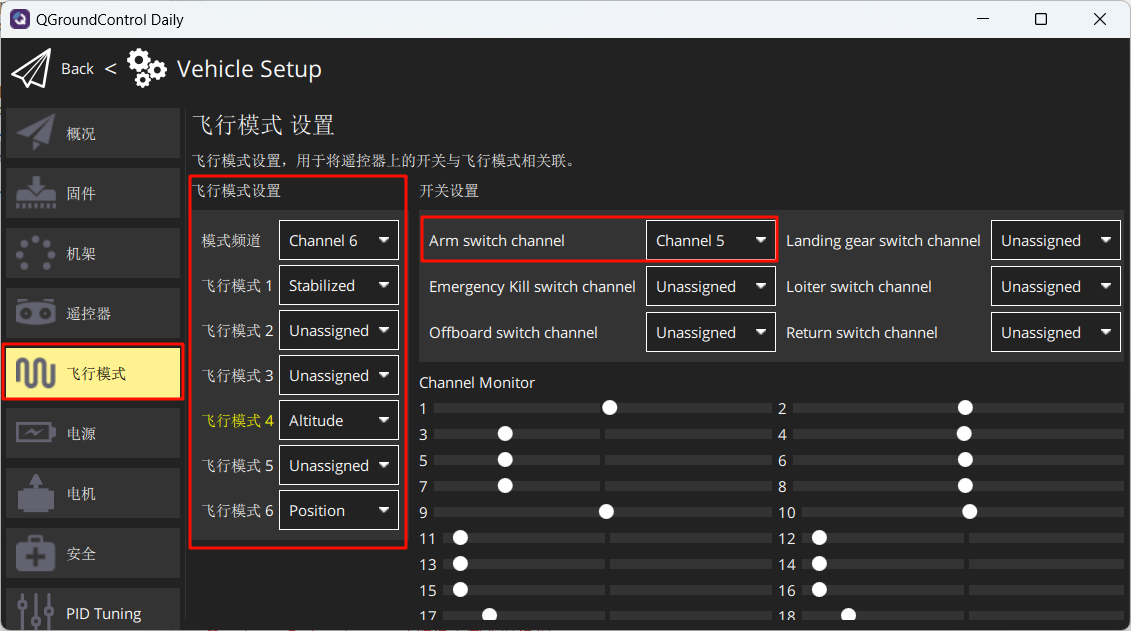
Set flight modes as shown below.
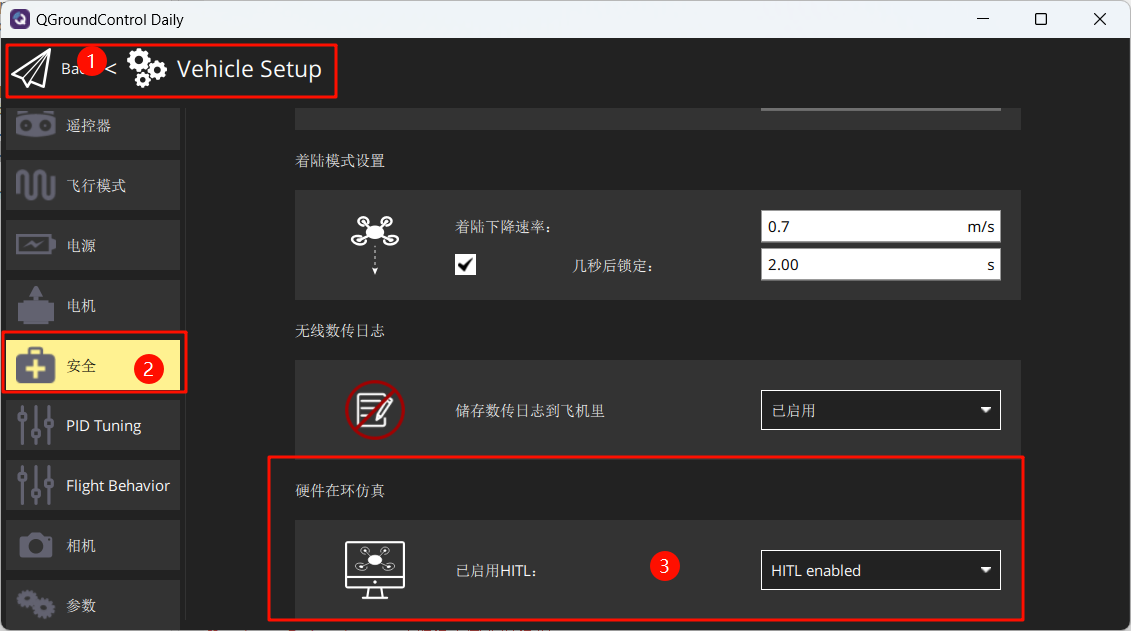
Under the Safety section, enable only Hardware-in-the-Loop (HIL) simulation.
4. Starting Hardware-in-the-Loop (HIL) Simulation
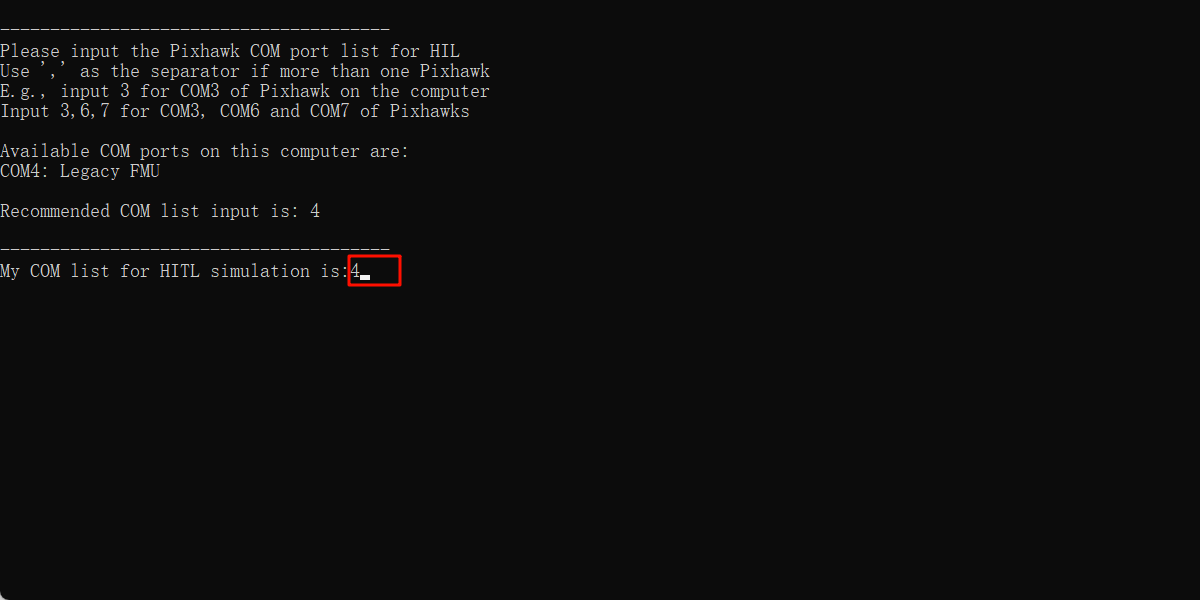
After completing the above setup, close QGC. Run the "[Installation Directory]\Desktop\RflyTools\HITLRun.lnk" script as Administrator. In the pop-up cmd window, enter the flight controller’s port number (e.g., 4).
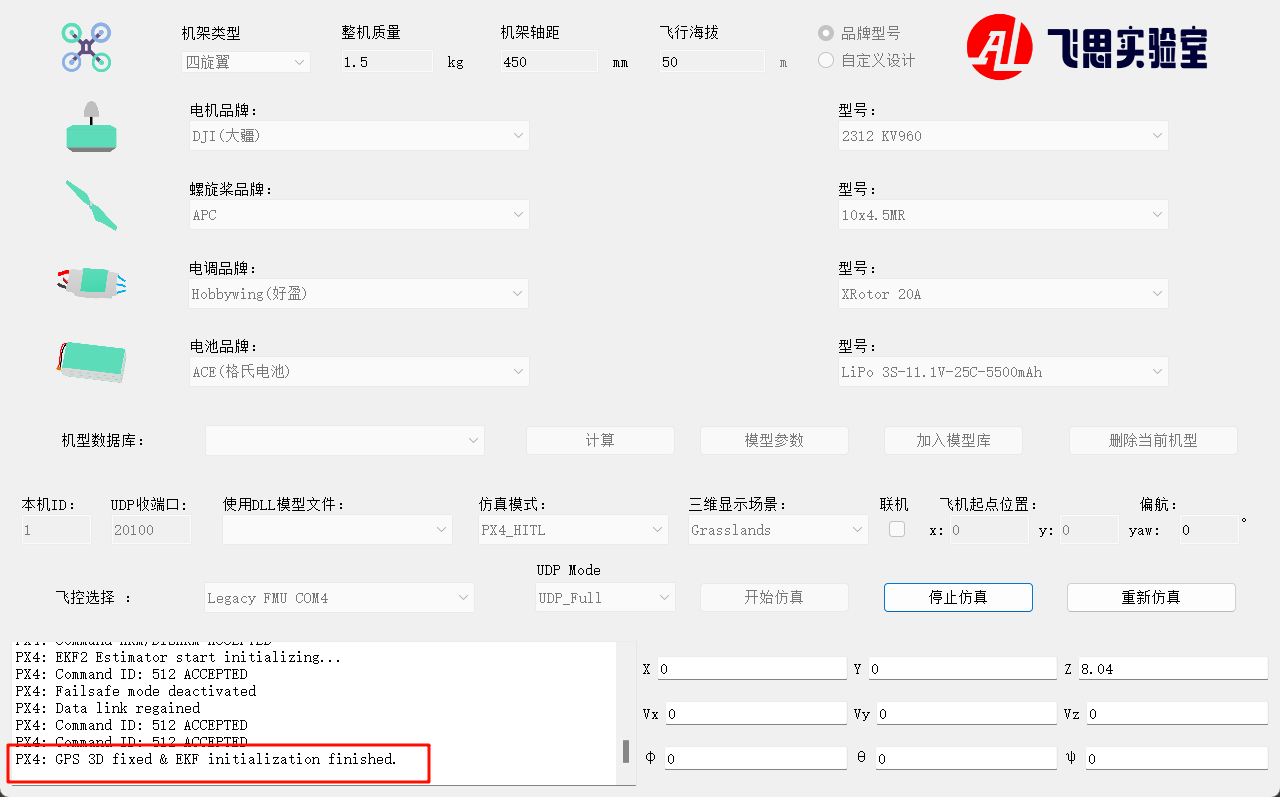
Wait until the bottom-left corner of CopterSim displays: “PX4: GPS 3D fixed & EKF initialization finished.”
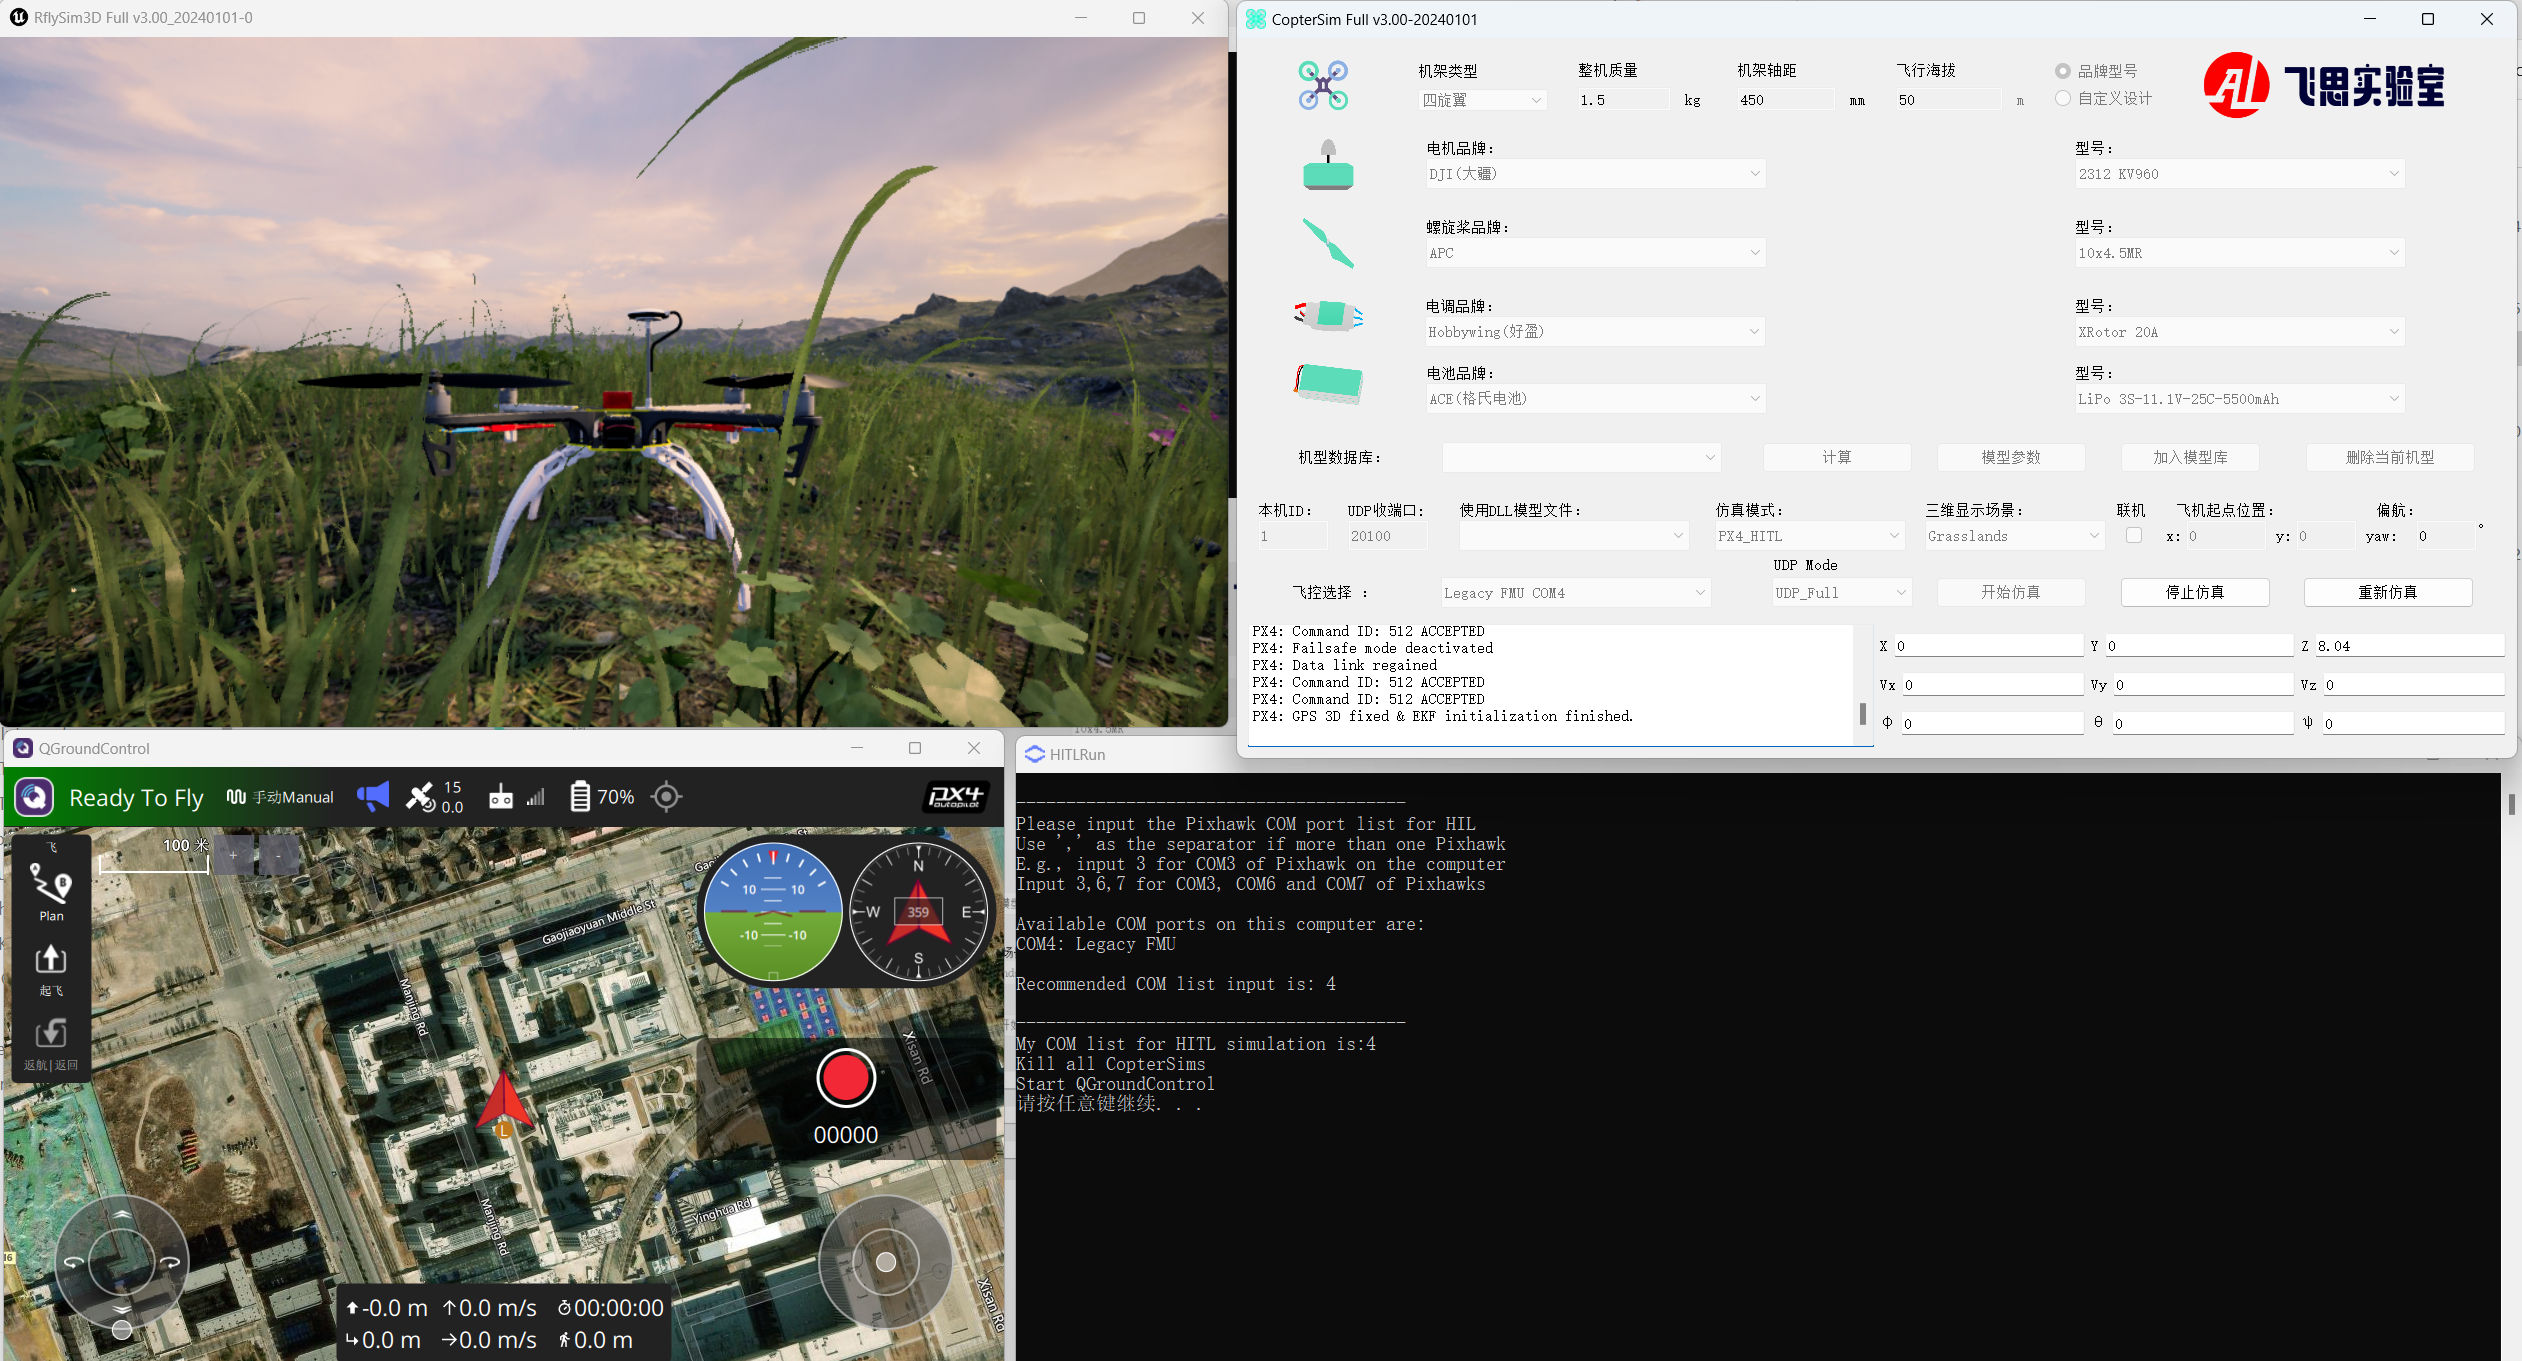
Disarm the aircraft via channel CH5 on the transmitter, and then take off and control the aircraft flight.