Toolchain Long-Term Support for Flight Controller Introduction 
1. Pixhawk 6X & 6X Mini
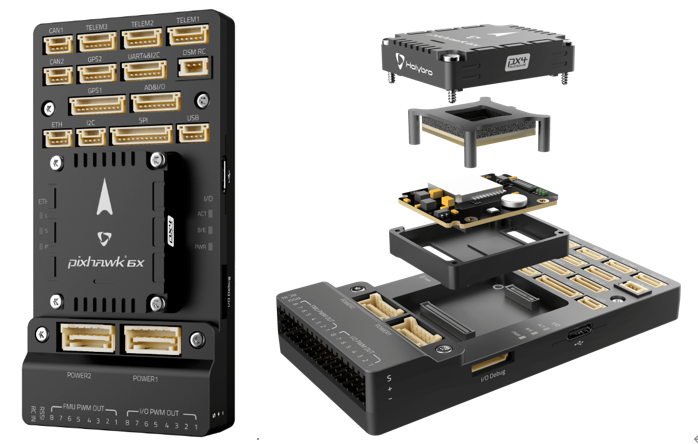
Inside the Pixhawk 6X, you will find a chip manufactured by ST based on the STM32H753, paired with sensor technologies provided by Bosch and InvenSense, delivering flexibility and reliability for controlling any autonomous vehicle—suitable for academic and commercial applications. The H7 microcontroller in the Pixhawk 6X features an Arm® Cortex®-M7 core running up to 480 MHz, with 2 MB of flash memory and 1 MB of RAM. The PX4 autopilot leverages this enhanced processing power and RAM. Thanks to the upgraded processing capability, developers can work more efficiently and productively, enabling more complex and sophisticated development tasks. The FMUv6X open standard includes a built-in high-performance, low-noise inertial measurement unit (IMU) designed to improve stability. Each sensor group is powered by an independent LDO with separate power control. A vibration isolation system filters high-frequency vibrations and reduces noise to ensure accurate readings, enabling the vehicle to achieve superior overall flight performance. The external sensor bus (SPI5) features two chip select lines and data-ready signals for connecting additional sensors and payloads via SPI interfaces, and includes a built-in Microchip Ethernet PHY for high-speed communication over Ethernet. The Pixhawk 6X is ideal for enterprise research labs, startups, academic research (including professors, graduate students, and undergraduates), and commercial applications. Its features include:
- High-performance STM32H753 processor;
- Removable flight controller board: independent IMU, FMU, and base system connected via 100-pin and 50-pin Pixhawk autopilot bus connectors;
- Redundancy: triple IMU sensors and dual barometric pressure sensors on their respective buses;
- Triple-redundant zones: fully isolated sensor zones with dedicated buses and independent power control;
- Newly designed vibration isolation system that filters high-frequency vibrations and reduces noise to ensure accurate readings;
- Ethernet interface for high-speed mission computer integration;
- IMU temperature control via built-in heating resistors to maintain optimal IMU operating temperature.
2. RflySim Configuration
If using the Pixhawk 6X flight controller hardware, the recommended software installation configuration is shown in the figure below; hardware connection configuration is identical to that of the Pixhawk 2.4.8.
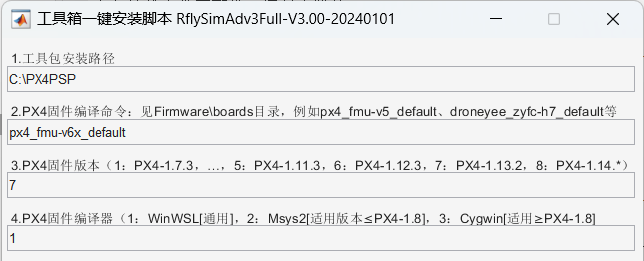
- Use the
px4_fmu-v6x_defaultcompilation command. - Select “7”: Firmware version PX4 1.13.2.
- Select “1”: WinWSL compiler.
3. Official Firmware and Restoration
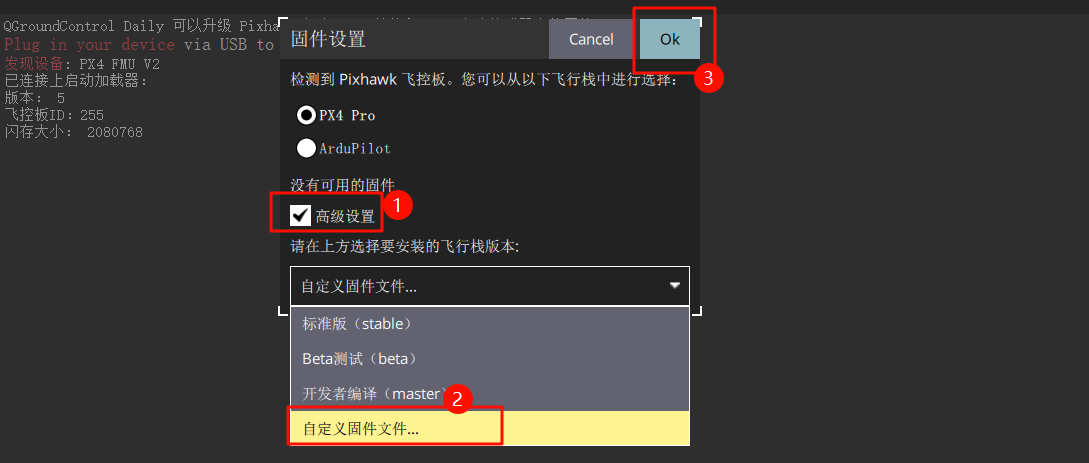
Open QGroundControl (QGC) and navigate to the following interface.
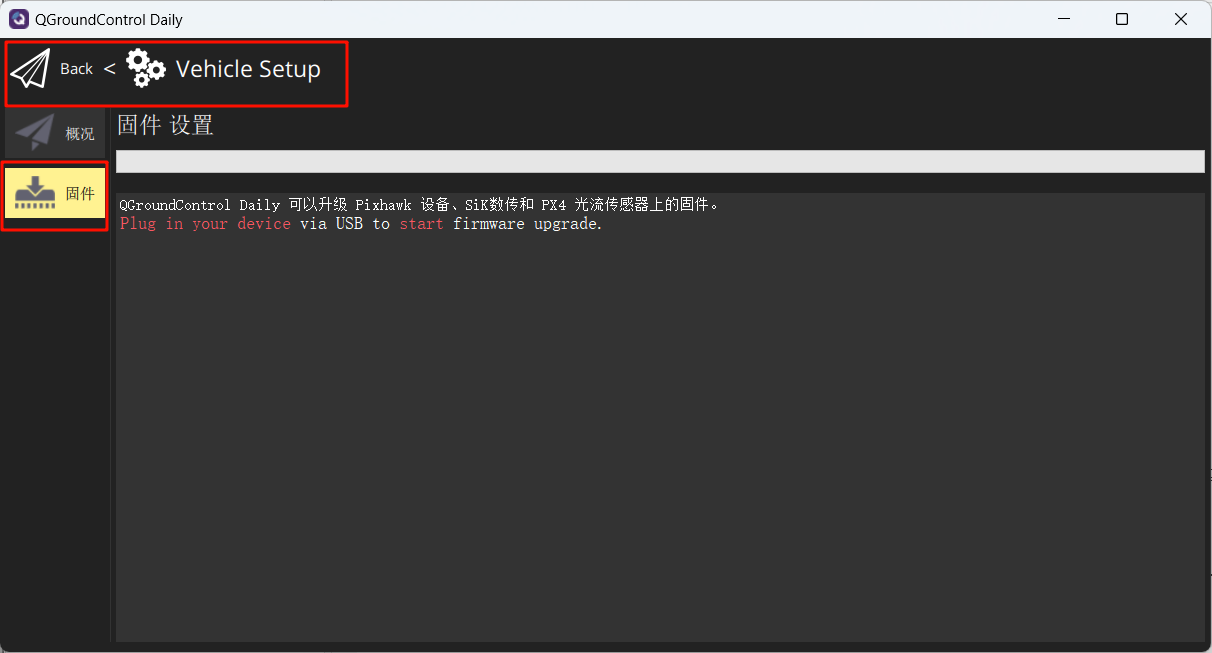
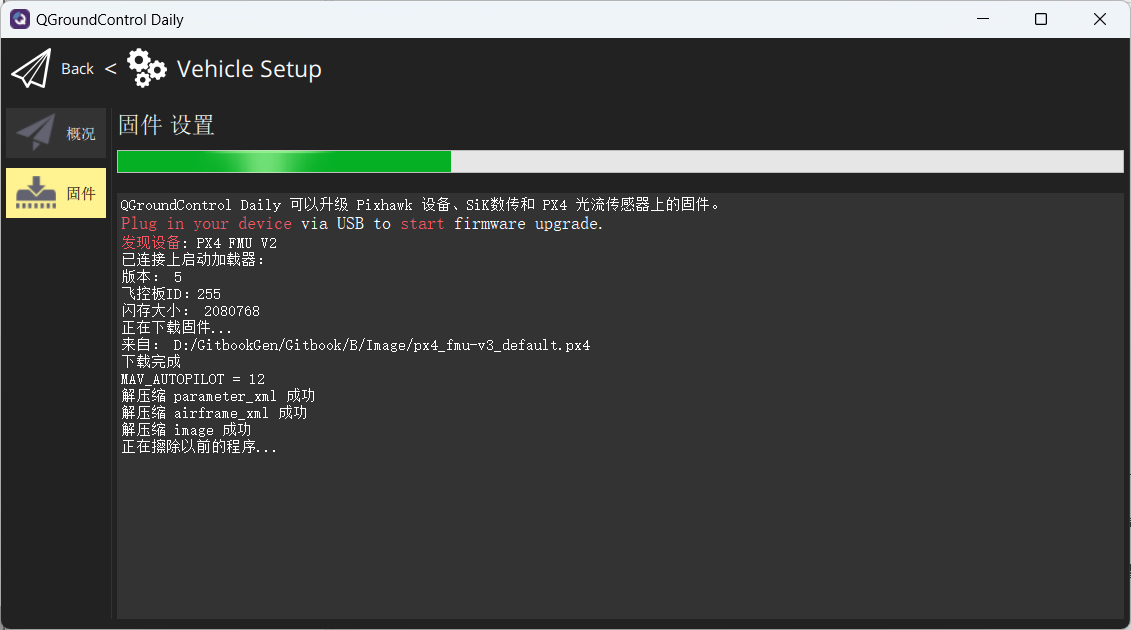
Connect the flight controller to the computer. In the pop-up interface, select Firmware and choose to flash the firmware: px4_fmu-v6x_default.px4
Wait for the firmware flashing process to complete.
Restore flight controller parameters to firmware defaults.

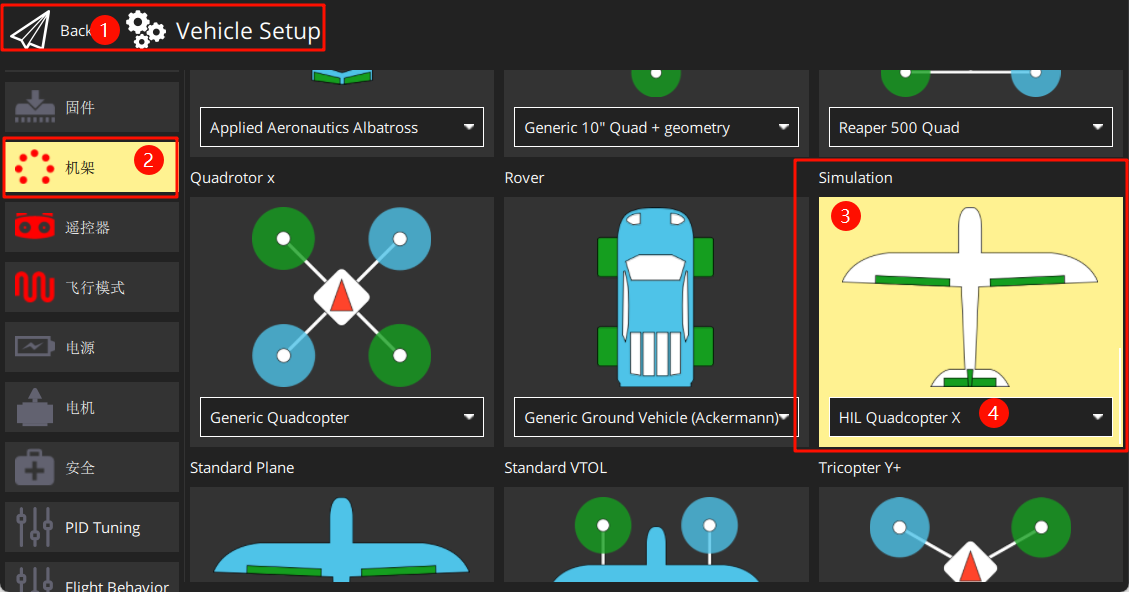
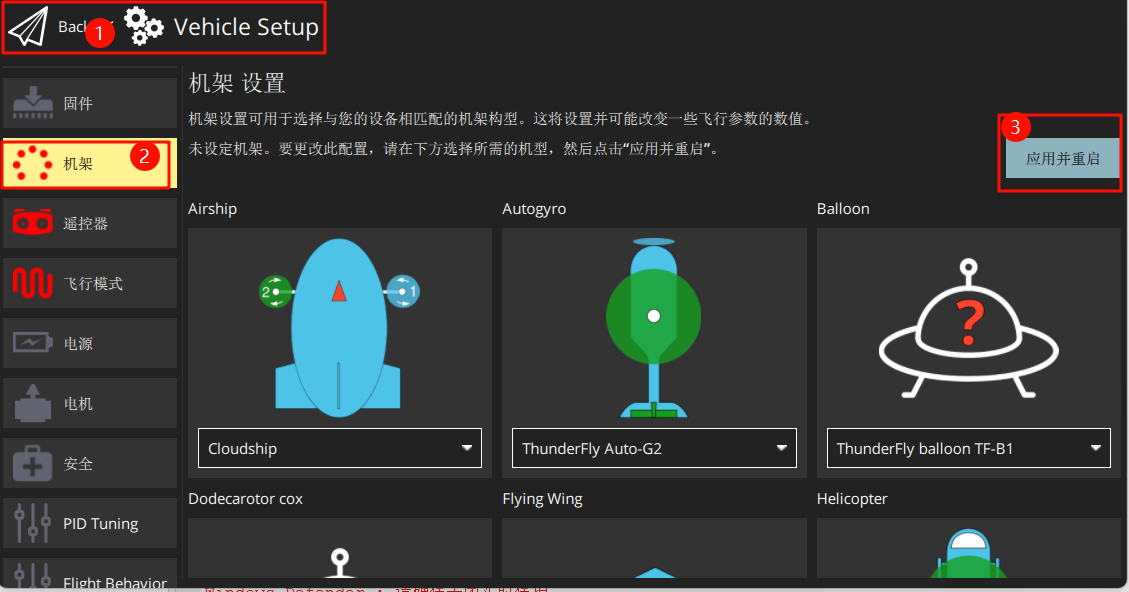
Set the airframe to HIL Quadcopter X, scroll to the top, and click Apply and Restart. Wait for the restart to complete.
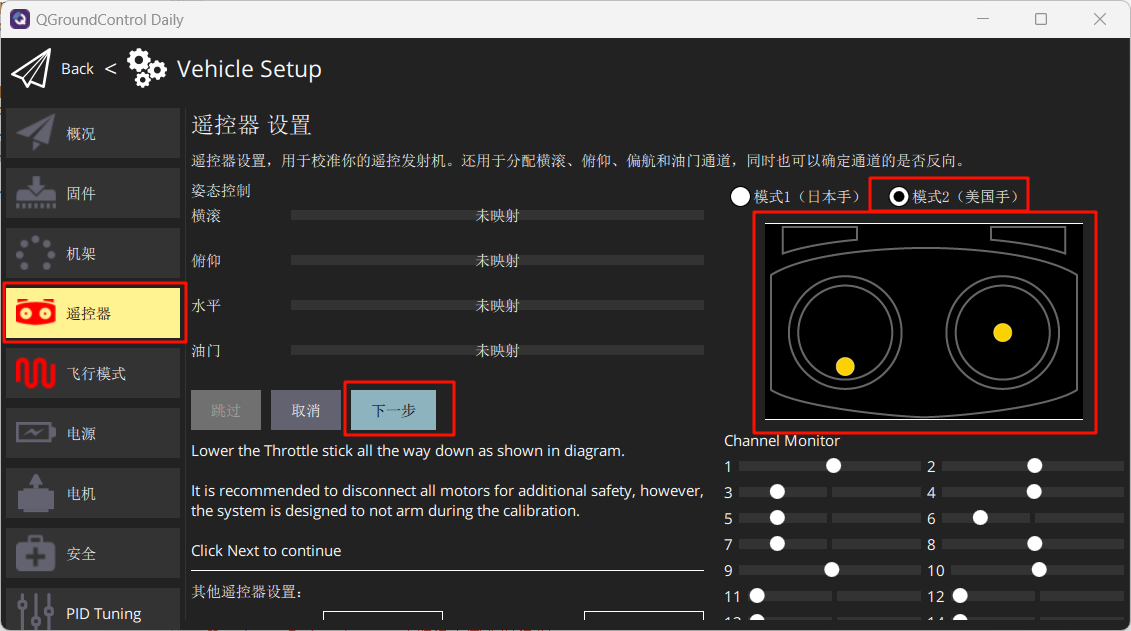
Connect the RC receiver (note pin sequence) and power on the remote controller. Calibrate the remote controller as shown.
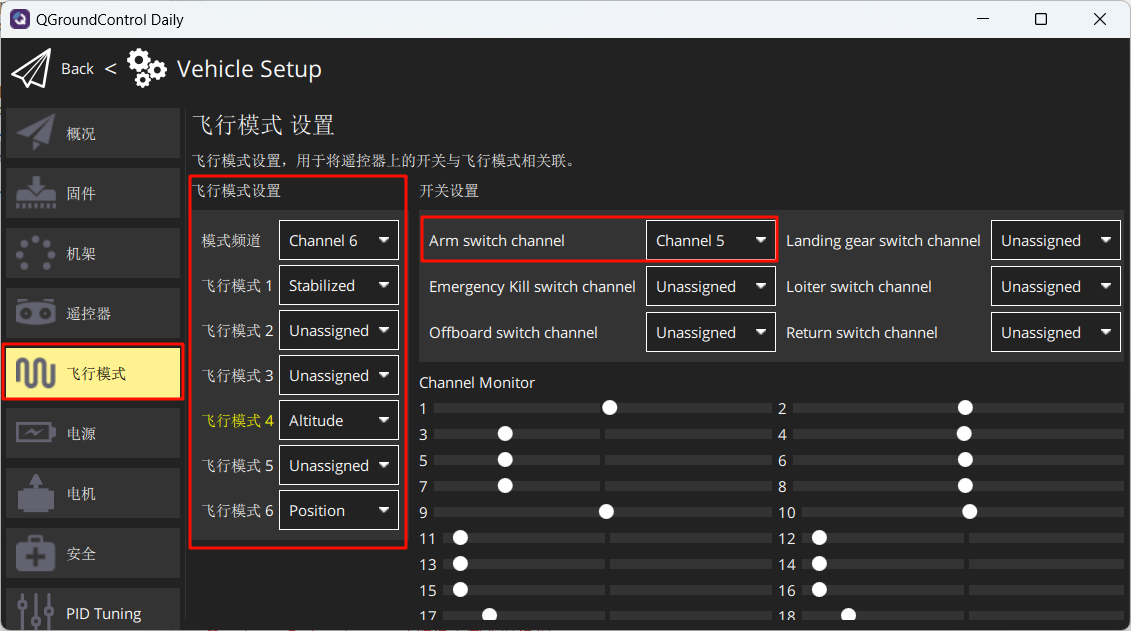
Set flight modes as shown below.
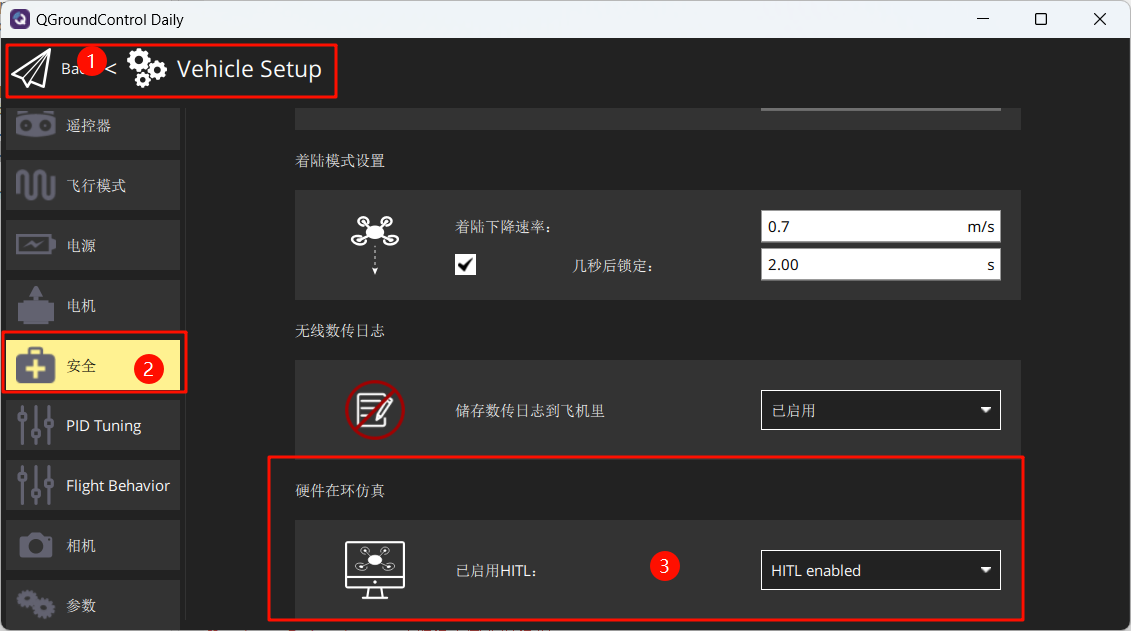
Under Safety, enable only Hardware-in-the-Loop (HIL) simulation.
4. Launch Hardware-in-the-Loop (HIL) Simulation
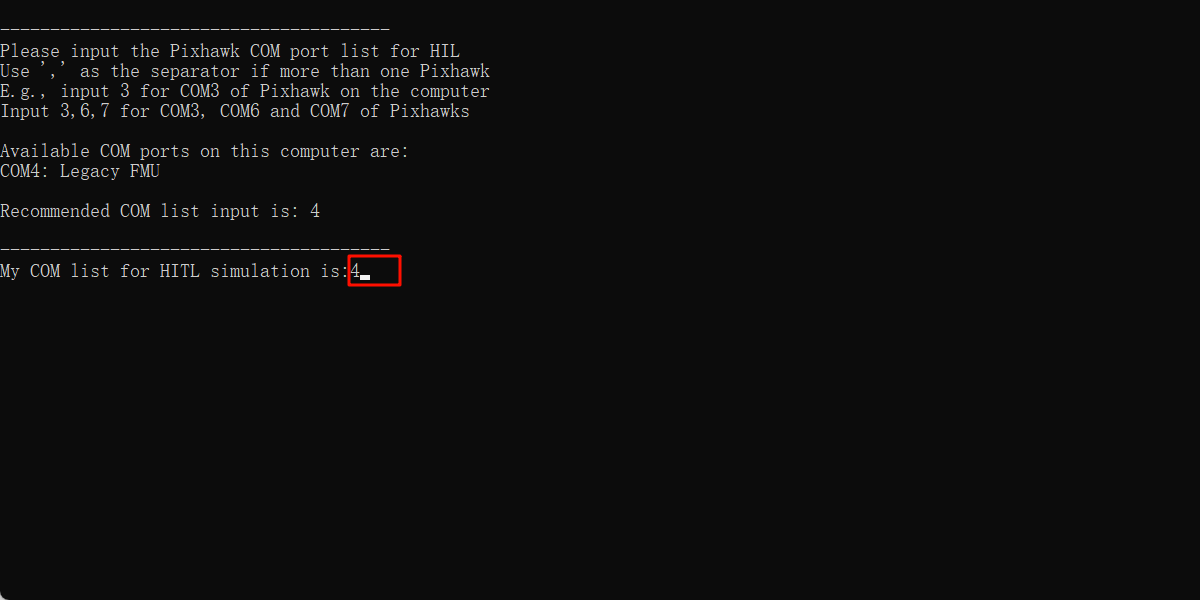
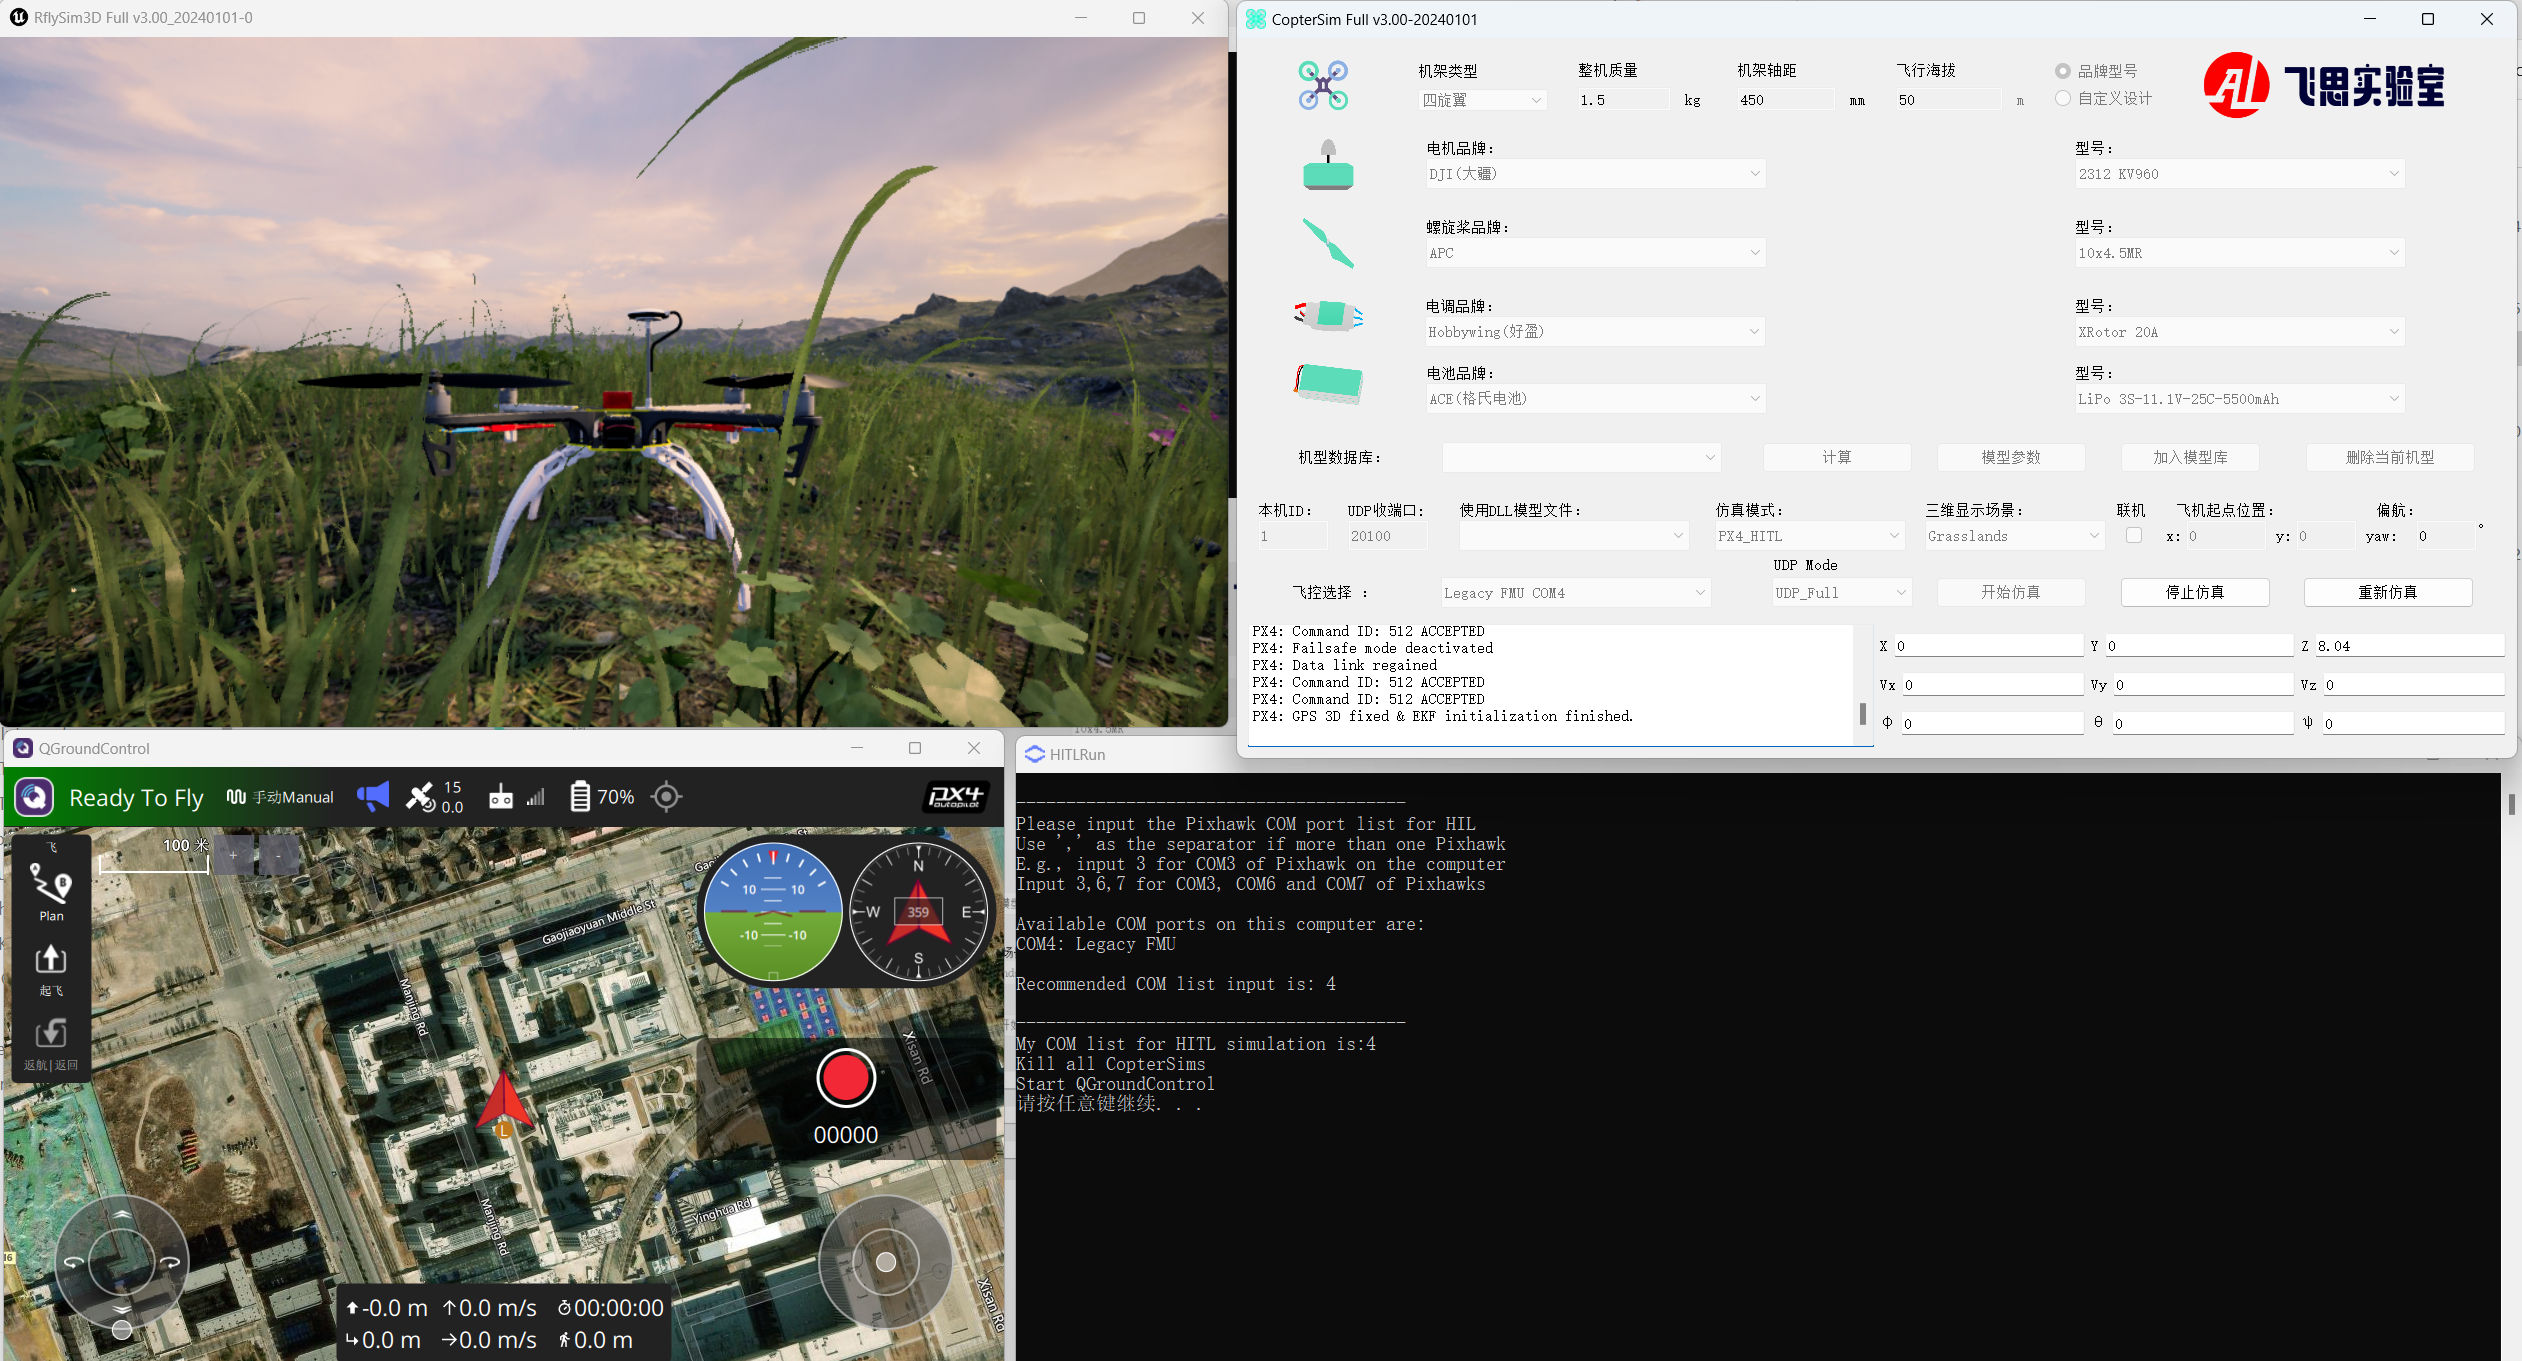
After completing the above setup, close QGC. Run the "[Installation Directory]\Desktop\RflyTools\HITLRun.lnk" script as Administrator. In the pop-up cmd window, enter the flight controller’s port number (e.g., 4).
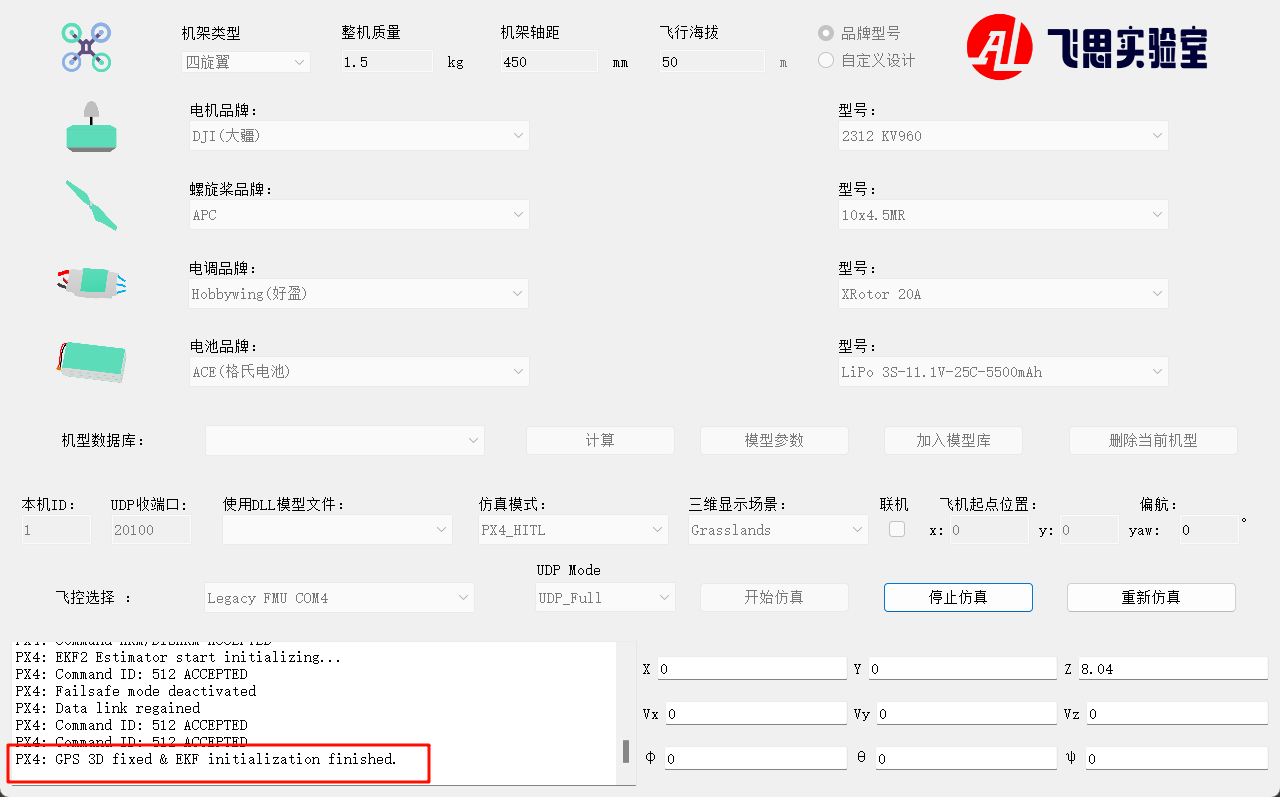
Wait until the bottom-left corner of CopterSim displays: PX4: GPS 3D fixed & EKF initialization finished.
Disarm the aircraft via channel CH5 on the remote controller, and then take off and control flight.