5-Minute Quick Start
After installation, you can get your first simulation experiment running in just a few steps! This page provides two paths: SITL (software-only) and HITL (with hardware).
Recommended Path
The vast majority of users should start with SITL Simulation, which requires no additional hardware.
SITL Simulation (Software-Only)

Step 1: Start the Simulation
- Navigate to the
RflyToolsfolder on your desktop and double-click theSITLRunshortcut - Enter
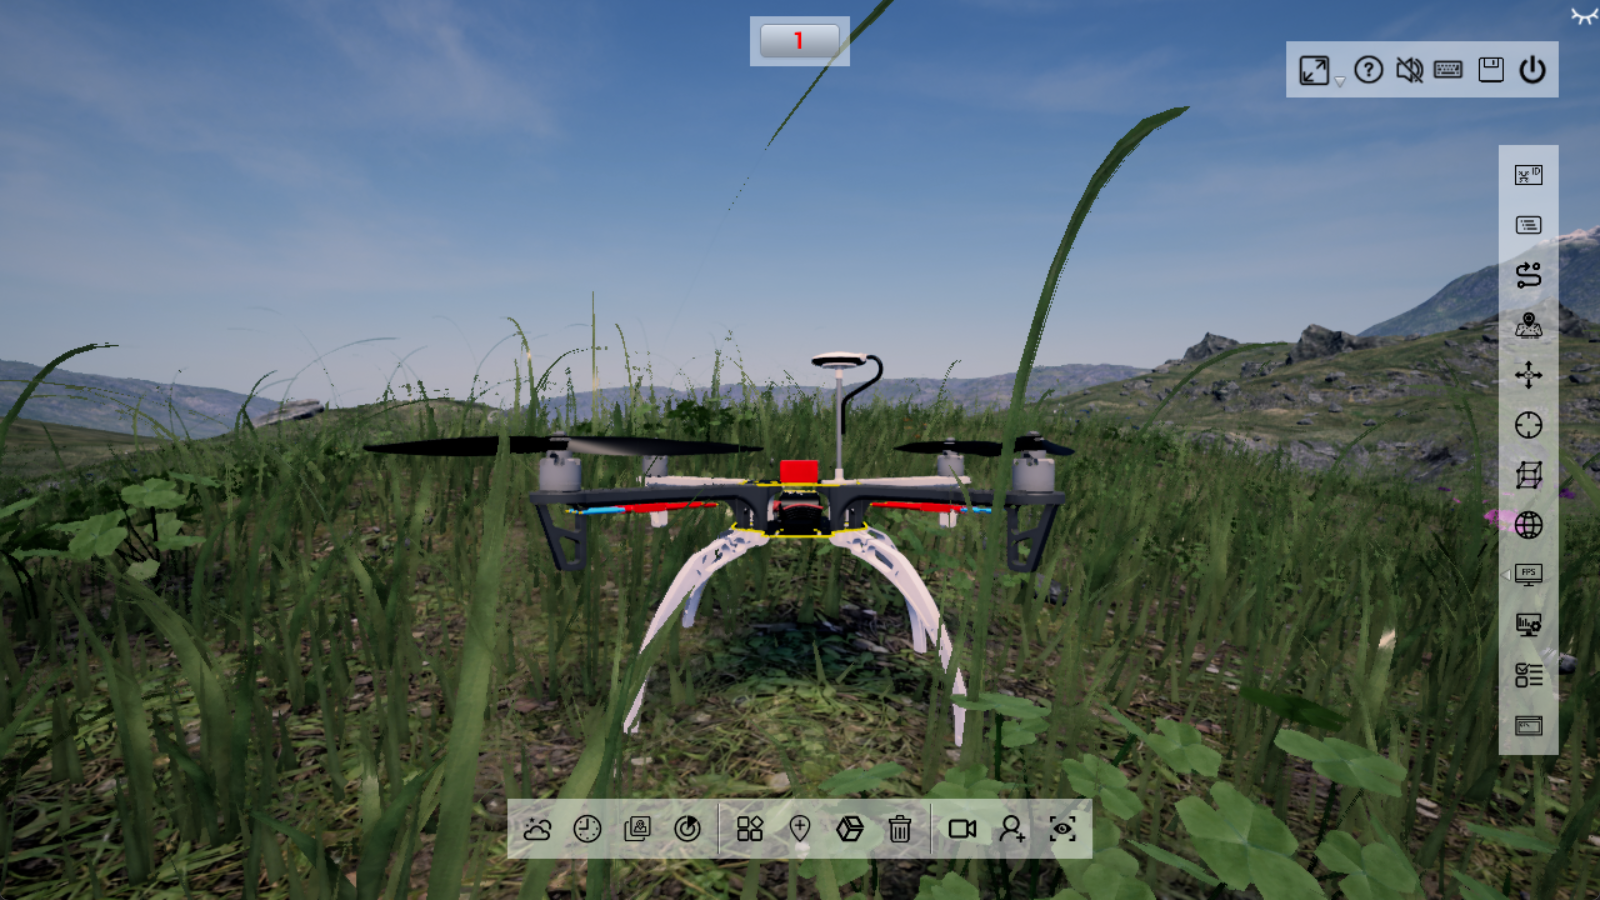
1in the pop-up CMD command window → press Enter (this means launching 1 quadrotor) - Wait for the system to automatically launch 1 instance each of CopterSim, QGroundControl, and RflySim3D. You can observe the generated quadrotor UAV in the RflySim3D software.
Step 2: Wait for Initialization
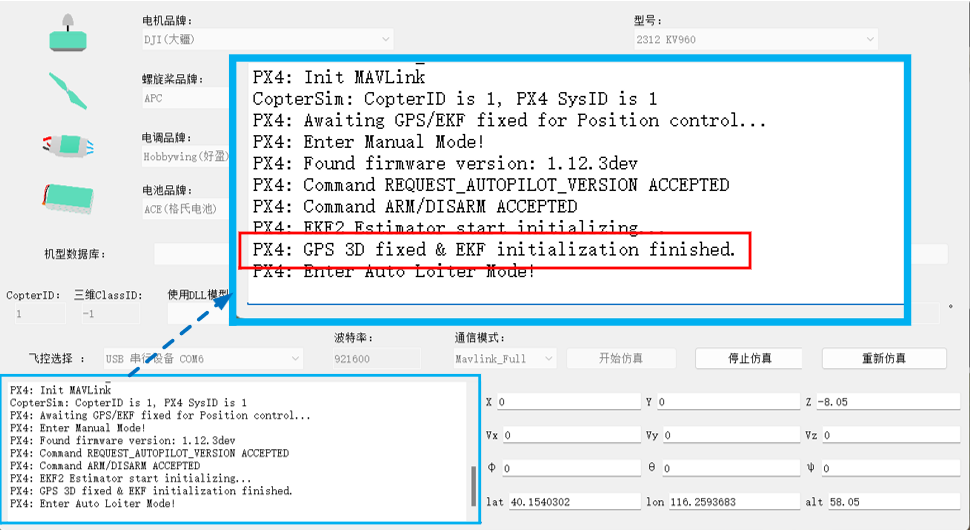
Wait until the log bar at the bottom of the CopterSim software displays GPS 3D fixed & EKF initialization finished, or observe the top-left corner of the RflySim3D window. When *** EKF 3DFixed is displayed, it indicates that the autopilot's state estimator has completed initialization, and positioning lock is successful.
Common Issues
If 3DFixed does not appear after waiting more than 30 seconds, please check:
- Whether your antivirus software is completely disabled
- Whether any network proxy or port forwarding program is interfering with UDP communication
- Whether your computer configuration meets the minimum requirements
Step 3: Command Takeoff
- In the QGroundControl ground station, confirm the current mode is Hold mode
- Click the Takeoff button in the top-left corner
- Drag the slider to confirm takeoff
Step 4: Verify Result
If the quadrotor in RflySim3D can take off smoothly and hover, your toolchain is correctly configured, and you have successfully completed your first introduction to RflySim.
Success!
Congratulations on completing your first SITL simulation! You can continue trying the following in QGroundControl:
- Set waypoint missions for autonomous flight
- Switch flight modes (e.g., Position / Mission / Return)
- Observe real-time telemetry data
Step 5: End the Simulation
Press any key in the CMD command window, and the system will automatically close all related programs.
HITL Simulation (With Hardware)
Prerequisites
- A PX4-compatible Pixhawk autopilot (Pixhawk 6X recommended)
- Please refer to the experiment: [RflySim Installation Path]/RflySimAPIs/1.RflySimIntro/2.AdvExps/e2.FCUIntro/Readme.pdf to configure the flight controller for HIL simulation mode in advance.
- Connected to the host computer via a USB cable
- The autopilot has been flashed with PX4 firmware (can be flashed using QGC)
Step 1: Connect Hardware
- Connect the Pixhawk to your computer using a USB cable
- After hearing the Pixhawk startup tone, confirm the COM port number in Device Manager
Step 2: Start the Simulation
- Navigate to the
RflyToolsfolder on your desktop and double-click theHITLRunshortcut - Enter the corresponding COM port number (e.g.,
COM3) in the pop-up CMD window, then press Enter - Wait for CopterSim → RflySim3D → QGC to launch in sequence
Step 3: Takeoff Test
Operation is the same as in SITL mode:
- Wait until the log bar at the bottom of the CopterSim software displays
GPS 3D fixed & EKF initialization finished, or observe the top-left corner of the RflySim3D window. When*** EKF 3DFixedis displayed, it indicates that the autopilot's state estimator has completed initialization. - Perform the same takeoff operation in QGC as in SITL mode
- Observe whether the quadrotor takes off smoothly
Low-Performance Computer Launch
If your computer's graphics card performance is insufficient, causing the aircraft to jitter during simulation, you can try the low-precision 3D scene mode by double-clicking RflyTools\SITLRunLowGPU or RflyTools\HITLRunLowGPU to launch.
Next Steps
After passing installation verification, you can:
- Enter the Core Course for systematic learning through the 10-chapter curriculum
- Check the Software Manual to learn more about how each component works
- Browse the Developer Reference directly to start API-level secondary development