WELF ET10
1.product presentation
ET10 is the enabling upgrade of ET07, full proportion of 10 channels, ET10 has the powerful function expansion gene of ET series, new external high-frequency head NANO interface, compatible with ELRS,TBS, plus Hall rocker, increase and broaden the battery storage capacity, Type-C interface, liquid metal surface appearance process and other new experience upgrades. More information can be found at:http://www.wflysz.com/product/332.html
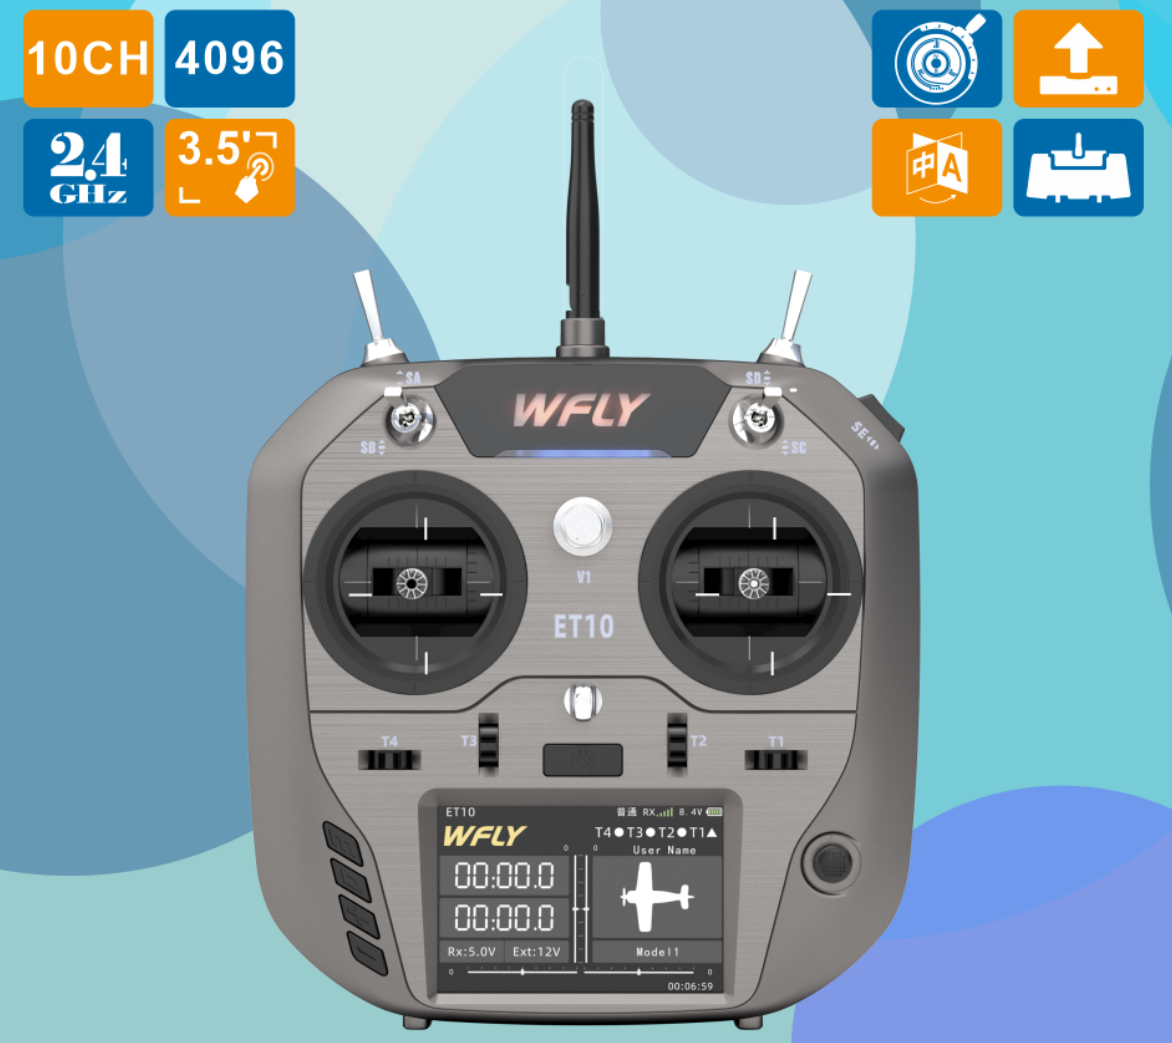
2.Description of product appearance and interface
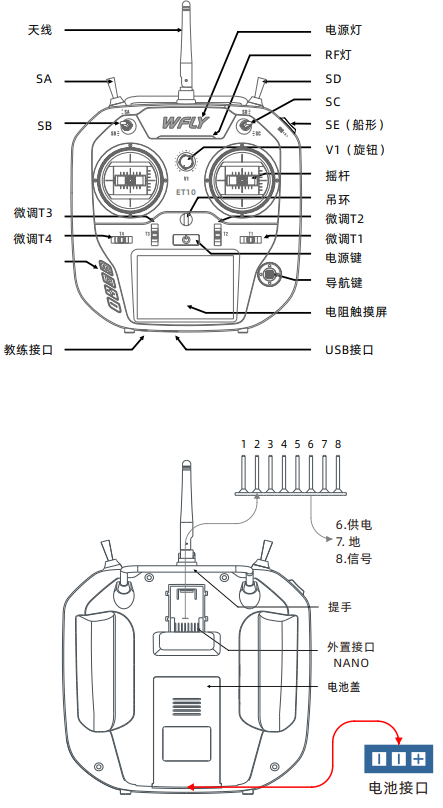
- Power switch: Press and hold for about 2 seconds to turn on or off
- T1~T4: Fine-tuning button (custom function)
- SA: Long handle with two gears (custom function)
- SB: Short handle with three gears (Custom Function)
- SC:Short handle with three gears (Custom Function)
- SD:Long handle with two gear reset (custom function)
- SE:Boat with three gears (Custom function)
- V1:Knob (custom function)

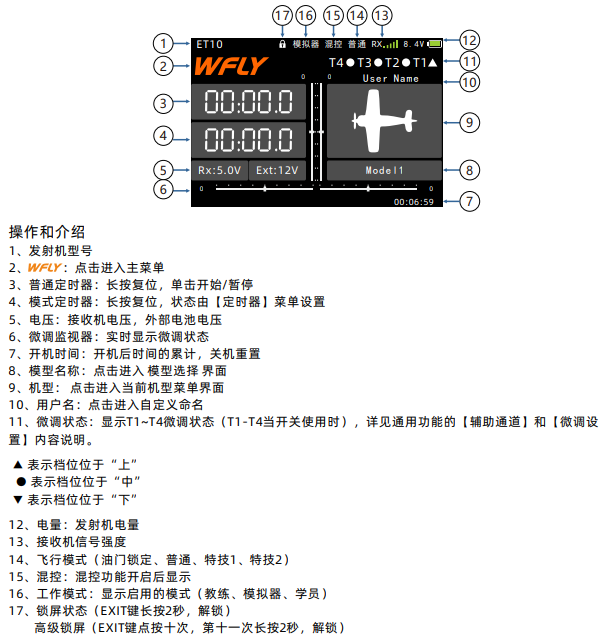
RF209S receiver description
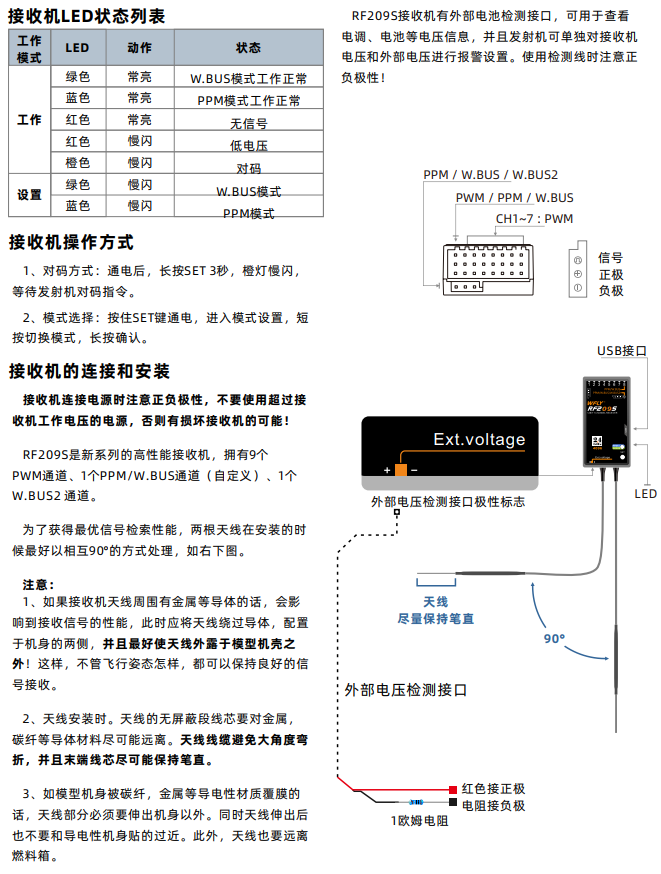
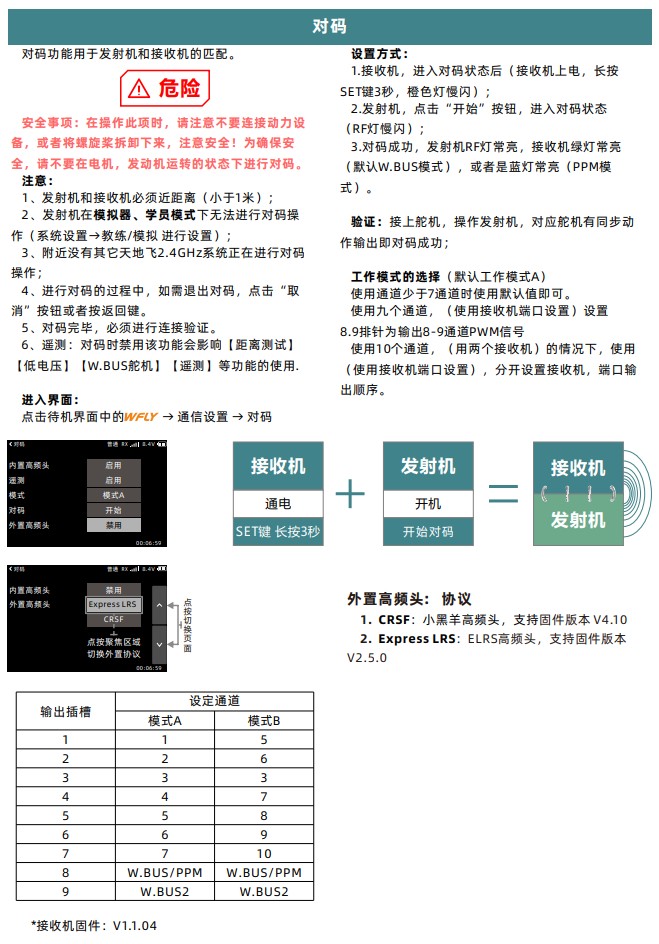
3.Remote control alignment
4.Multi-rotor simulation and flight setup
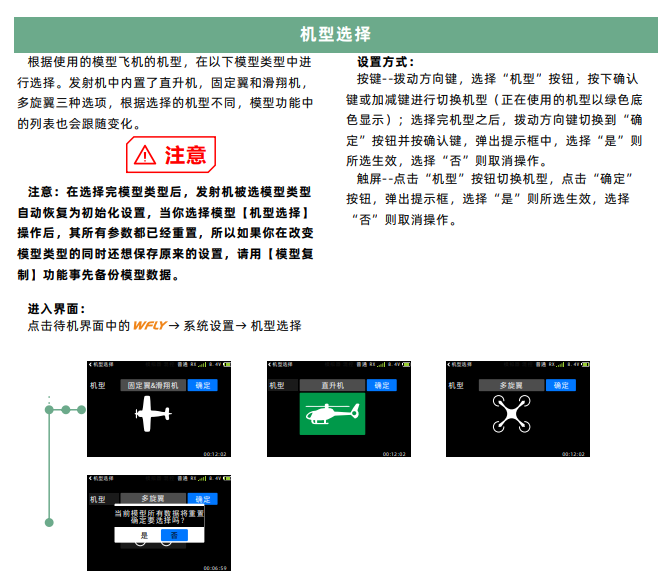
4.1.Model switching
Select a multi-rotor model as shown below.
Roll, pitch, throttle and yaw in the controller correspond to the CH1~CH4 channel of the receiver respectively, and the left and right upper side lever corresponds to the CH5/CH6 channel to trigger the flight mode switch. The throttle rod (CH3 channel) corresponds to the PWM signal fluctuation from 1100 to 1900 from the bottom end and the top end respectively (different channels or different remote controls will be different, so need to be calibrated); Roll (CH1 channel) and yaw (CH4 channel) rockers from leftmost end to rightmost end correspond to PWM signals from 1100 to 1900; The pitch (CH2 channel) rocker corresponds to the PWM signal from 1900 to 1100 from the bottom to the top; The CH5/6 is a three-segment switch, from the top (the gear closest to the user) to the bottom (the gear closest to the user) corresponding to the PWM signal 1100, 1500 and 1900.
Configuration and calibration methods are as follows:
Connect Pixhawk to the receiver correctly, use USB cable to connect Pixhawk to the computer, open the remote control, open the QGroundControl ground station software, click the "Radio" TAB.
Click the CH1 to CH5 channels (see top right) of the remote control from left to right (or top to bottom), and observe the white dots of each channel in the red box area on the right side of the ground station in the bottom right. If you observe that dots 1, 2, 4, 5, 6 move from left to right (PWM from 1100 to 1900); Dot 3 moves from right to left, indicating that the remote control is set correctly. Otherwise, you need to reconfigure the remote control.
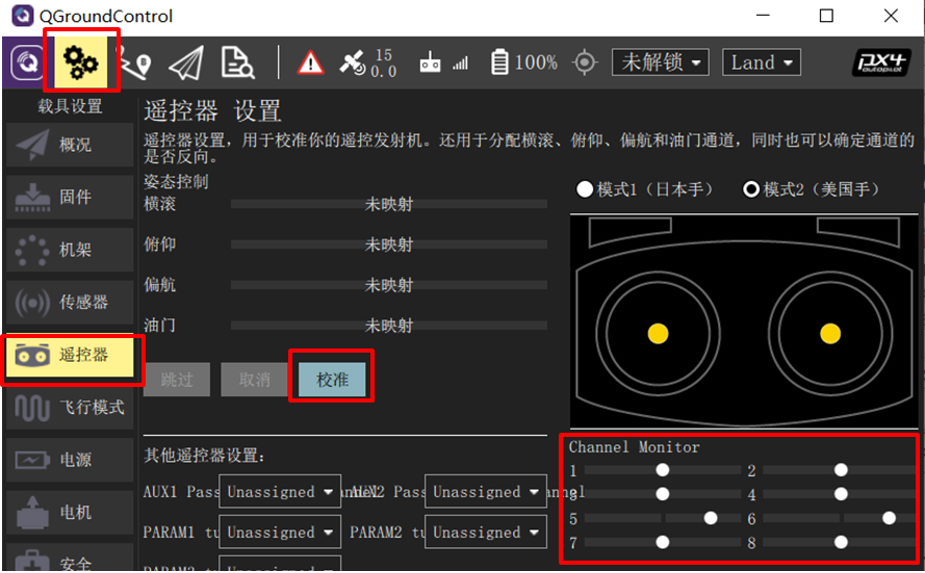
Click the "Calibrate" button on the bottom right and follow the prompts to calibrate the remote control.
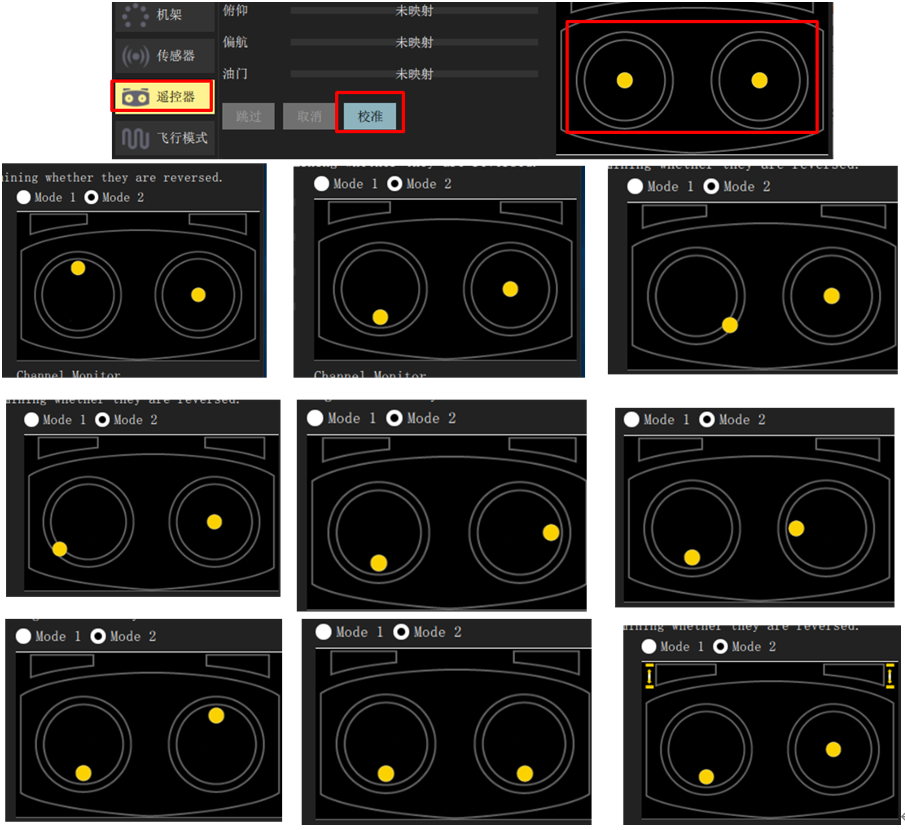
Click the "Calibrate" - "Next" button on the QGC ground station, and then place the rocker in the position shown on the right (according to the real-time prompts on the QGC page) to complete the remote control calibration.
4.2 Airplane Mode Settings
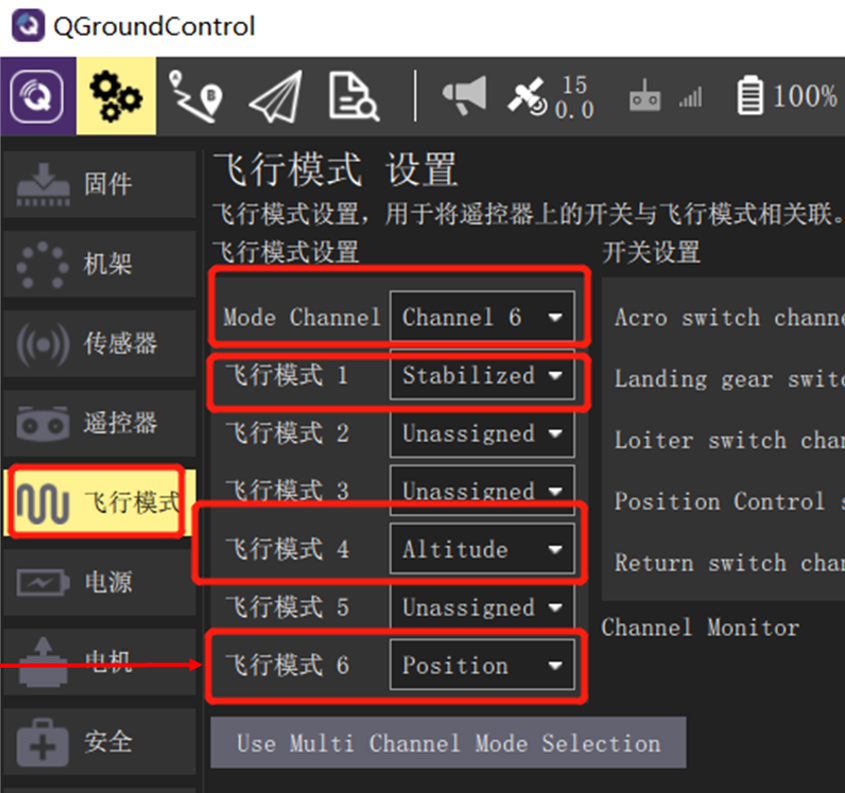
- After the above remote control calibration step, click the ground station to enter the "Flight Modes" setting page, and select "Mode Channel" as the Channel 6 channel tested above. Since the CH6 channel is a three-segment switch, the top, middle and lower gears of the switch correspond to the three labels of "Flight Mode 1, 4 and 6" respectively.
- The three labels are set to "Stabilized" (self-stabilized mode with only attitude control), "Altitude" (fixed altitude mode with attitude and altitude control), and "Position" (fixed altitude mode with attitude, fixed altitude, and horizontal position control). In the subsequent hardware-in-the-loop simulation, different control effects can be experienced by switching different modes.
5. mode switch
5.1 Self-stabilizing mode(multi-rotor drone)
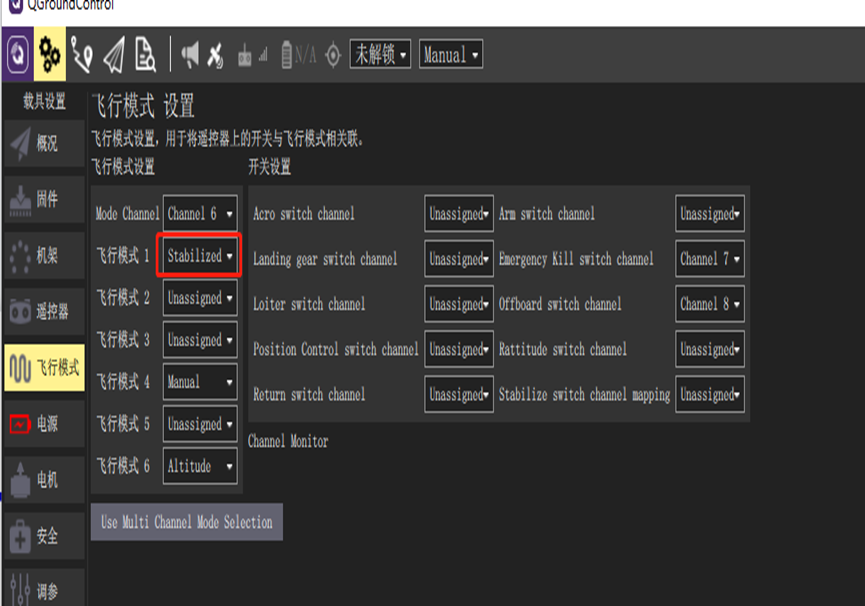
Self-stabilizing mode The multi-rotor UAV will self-stabilize when the remote control rocker is centered. To manually make the body move/fly, you can move the joystick so that it is off center. Under manual control, the roll and pitch joysticks control the Angle (attitude) of the body around each axis, the heading joystick controls the rate of rotation above the horizontal plane, and the throttle controls the height/speed.
Once the joystick is released, they will return to the central dead zone. Once the roll and pitch rocker are centered, the multi-rotor drone will stabilize and stop moving. The body will then hover in the proper position/maintain altitude - provided the balance is right, the throttle is set properly (view below), and no external forces are applied (e.g. wind). The vehicle will drift in any wind direction and you must control the throttle to maintain altitude.
5.2 Self-stabilizing mode(fixed-wing drone)
The self-stabilizing mode puts the vehicle into a steady and level flight during the rocker return, maintaining attitude level and resisting wind (but excluding aircraft heading and altitude).
If the roll/pitch rocker bar is not zero, the drone climbs/descends and performs a coordinated turn based on the pitch input. Roll and pitch are angle-controlled (can't roll up or down or cycle).
If the throttle drops to 0% (motor stops), the aircraft will taxi. In order to perform the turn, the command must be maintained throughout the maneuver, because if the roll rocker is released, the aircraft will stop turning and level itself (the same is true for pitch and yaw commands). Note: The self-stabilizing mode can easily be used to keep the aircraft level by reversing the rocker.
5.3 Fixed height mode(multi-rotor drone)
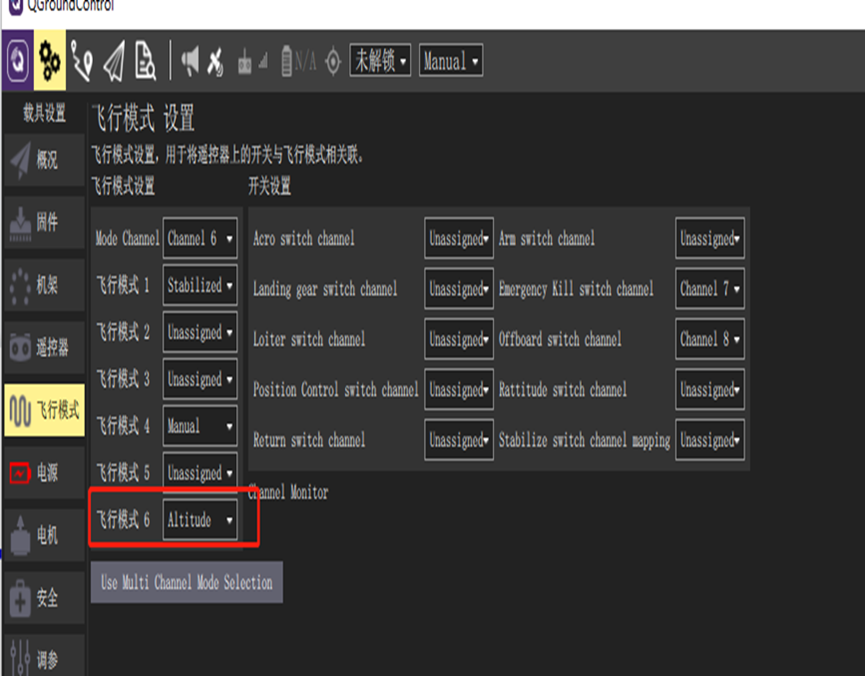
Set height mode is a relatively easy to fly remote control mode, roll and pitch rod control the body in the left and right and forward direction of the movement (relative to the "front" of the body), yaw rod control the horizontal plane rotation speed, throttle control the speed of rise-descent.
When the rod is released/returned, the body will return to level and maintain its current height. If moving in a horizontal plane, the body will continue to move until any momentum is dissipated by wind resistance. If it is windy, the plane will drift in the direction of the wind. Note: For beginners, fixed height mode is the safest manual mode without GPS. Just like the self-stabilizing mode, but it also locks the body height when releasing the rocker.
The fixed altitude mode makes it easier for the operator to control the altitude of the aircraft, especially to reach and maintain a fixed altitude. The mode does not attempt to resist wind disturbances to stay on course.
The climb/sink rate is controlled by the pitch/elevator lever lever. Once the joystick is returned, the autopilot locks the current altitude and maintains it under yaw/roll and any airspeed conditions.
Throttle channel input controls airspeed. Roll and pitch are angle-controlled (so it is not possible to roll or circle the aircraft).
When all remote control inputs are centered (no roll, pitch, yaw, throttle about 50%), the aircraft will return to straight level flight (affected by wind) and maintain its current altitude.
5.4 fixed point mode(multi-rotor drone)
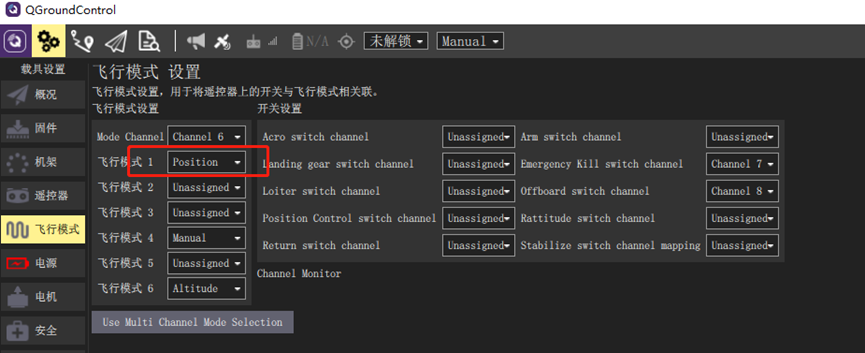
The fixed point mode is a simple and difficult remote control mode, in which the roll and pitch rocker controls the acceleration of the body in the left and right directions relative to the ground (similar to the accelerator pedal of a car), and the accelerator controls the speed of ascent and descent. When the rocker is released/centered, the body will actively brake, remain level, and lock into position in 3D space - compensating for wind and other forces. Note: Fixed point mode is the safest manual mode for beginners. Unlike fixed height mode and self-stabilizing mode, the body stops when the rocker is in mid-position, rather than continuing until wind resistance slows it down.
Landing in this mode is easy:
Use roll and pitch levers to control the drone's horizontal position above the landing point.
Release the roll and pitch bar and give it enough time to stop completely.
Gently pull the throttle lever down until the body touches the ground.
Pull the throttle all the way down to facilitate and accelerate landing detection.
The body will reduce propeller thrust, detect the ground and automatically lock (default).
Note: Although very rare on well-calibrated airframes, sometimes landing can be problematic. If the body cannot stop moving horizontally: you can still land in controlled altitude mode. The method is the same as above, except that you must manually ensure that the body remains above the landing point using the roll and pitch bar. Check GPS and magnetic compass directions after landing and calibrate. If the body does not detect the ground/landing and locks. When the body lands, switch to manual/self-stabilizing mode, keep the throttle lever low, and use hand gestures or other commands to manually lock. Alternatively, you can use the power off switch when the body is already on the ground.